CI/CD Implementation using GitHub Actions with TypeScript and Jest

You may want to read this article in Bahasa Indonesia version: Implementasi CI/CD Menggunakan GitHub Actions dengan TypeScript dan Jest
Introduction
Continuous Integration (CI) and Continuous Deployment (CD) are crucial components in modern software development. With CI/CD, we can automate the processes of testing, building, and deployment, ensuring that our application is always ready for release. In this article, we will thoroughly explore how to implement CI/CD on GitHub using GitHub Actions, TypeScript, and Jest.
Step 1: Setting Up the Project and Integrating GitHub Actions
Preparing the Project
To get started, we need to set up a Node.js project using TypeScript. In this article, we will use Node.js version 22.11.0, so make sure you have this version installed. The first step is to initialize the project and install the necessary dependencies:
npm init -y
npm install @babel/preset-env @babel/preset-typescript @jest/globals @types/jest @types/node @typescript-eslint/eslint-plugin @typescript-eslint/parser babel-jest eslint eslint-config-prettier eslint-plugin-jest jest prettier ts-jest tsx typescript --save-dev
npx tsc --init
Setting Up the Folder Structure
Atur struktur folder sebagai berikut:
/project-root
  └── src
      └── index.ts
  └── tests
      └── index.test.ts
Create an index.ts file inside the src folder and an index.test.ts file inside the tests folder. The content of index.ts can be customized, but you can refer to the example code below:
export function arraySum(numbers: Array<number>): number {
  let sum = 0;

  for (let index = 0; index < numbers.length; index++) {
    const number = numbers[index];

    sum = sum + number;
  }

  return sum;
}
Writing Unit Tests
Add a simple unit test in index.test.ts to verify the function in index.ts.
import { arraySum } from "../src";

describe("array sum", () => {
  it("return 15", () => {
    expect(arraySum([1, 2, 3, 4, 5])).toBe(15);
  });

  it("return 6", () => {
    expect(arraySum([1, 2, 3])).toBe(6);
  });

  it("return 3", () => {
    expect(arraySum([1, 2])).toBe(3);
  });
});
Next, create a babel.config.json file in the root folder so that Jest can read the TypeScript files:
{
  "presets": [
    "@babel/preset-env",
    "@babel/preset-typescript"
  ]
}
Configuring GitHub Actions
Create a configuration file .github/workflows/main.yml in the project root:
name: CI

on:
  push:
    branches:
      - main
  pull_request:

env:
  NODE_VERSION: 22.11.0

jobs:
  test:
    runs-on: ubuntu-latest

    steps:
      - name: Checkout
        uses: actions/checkout@v4

      - name: Setup Node.js
        uses: actions/setup-node@v4
        with:
          node-version: ${{ env.NODE_VERSION }}

      - name: Install dependencies
        run: npm install

      - name: Run test
        run: npm run test
This pipeline will automatically run whenever there are changes in the main branch or when a pull request is created.
Step 2: Testing and Validating the Pipeline
Running the First Pipeline
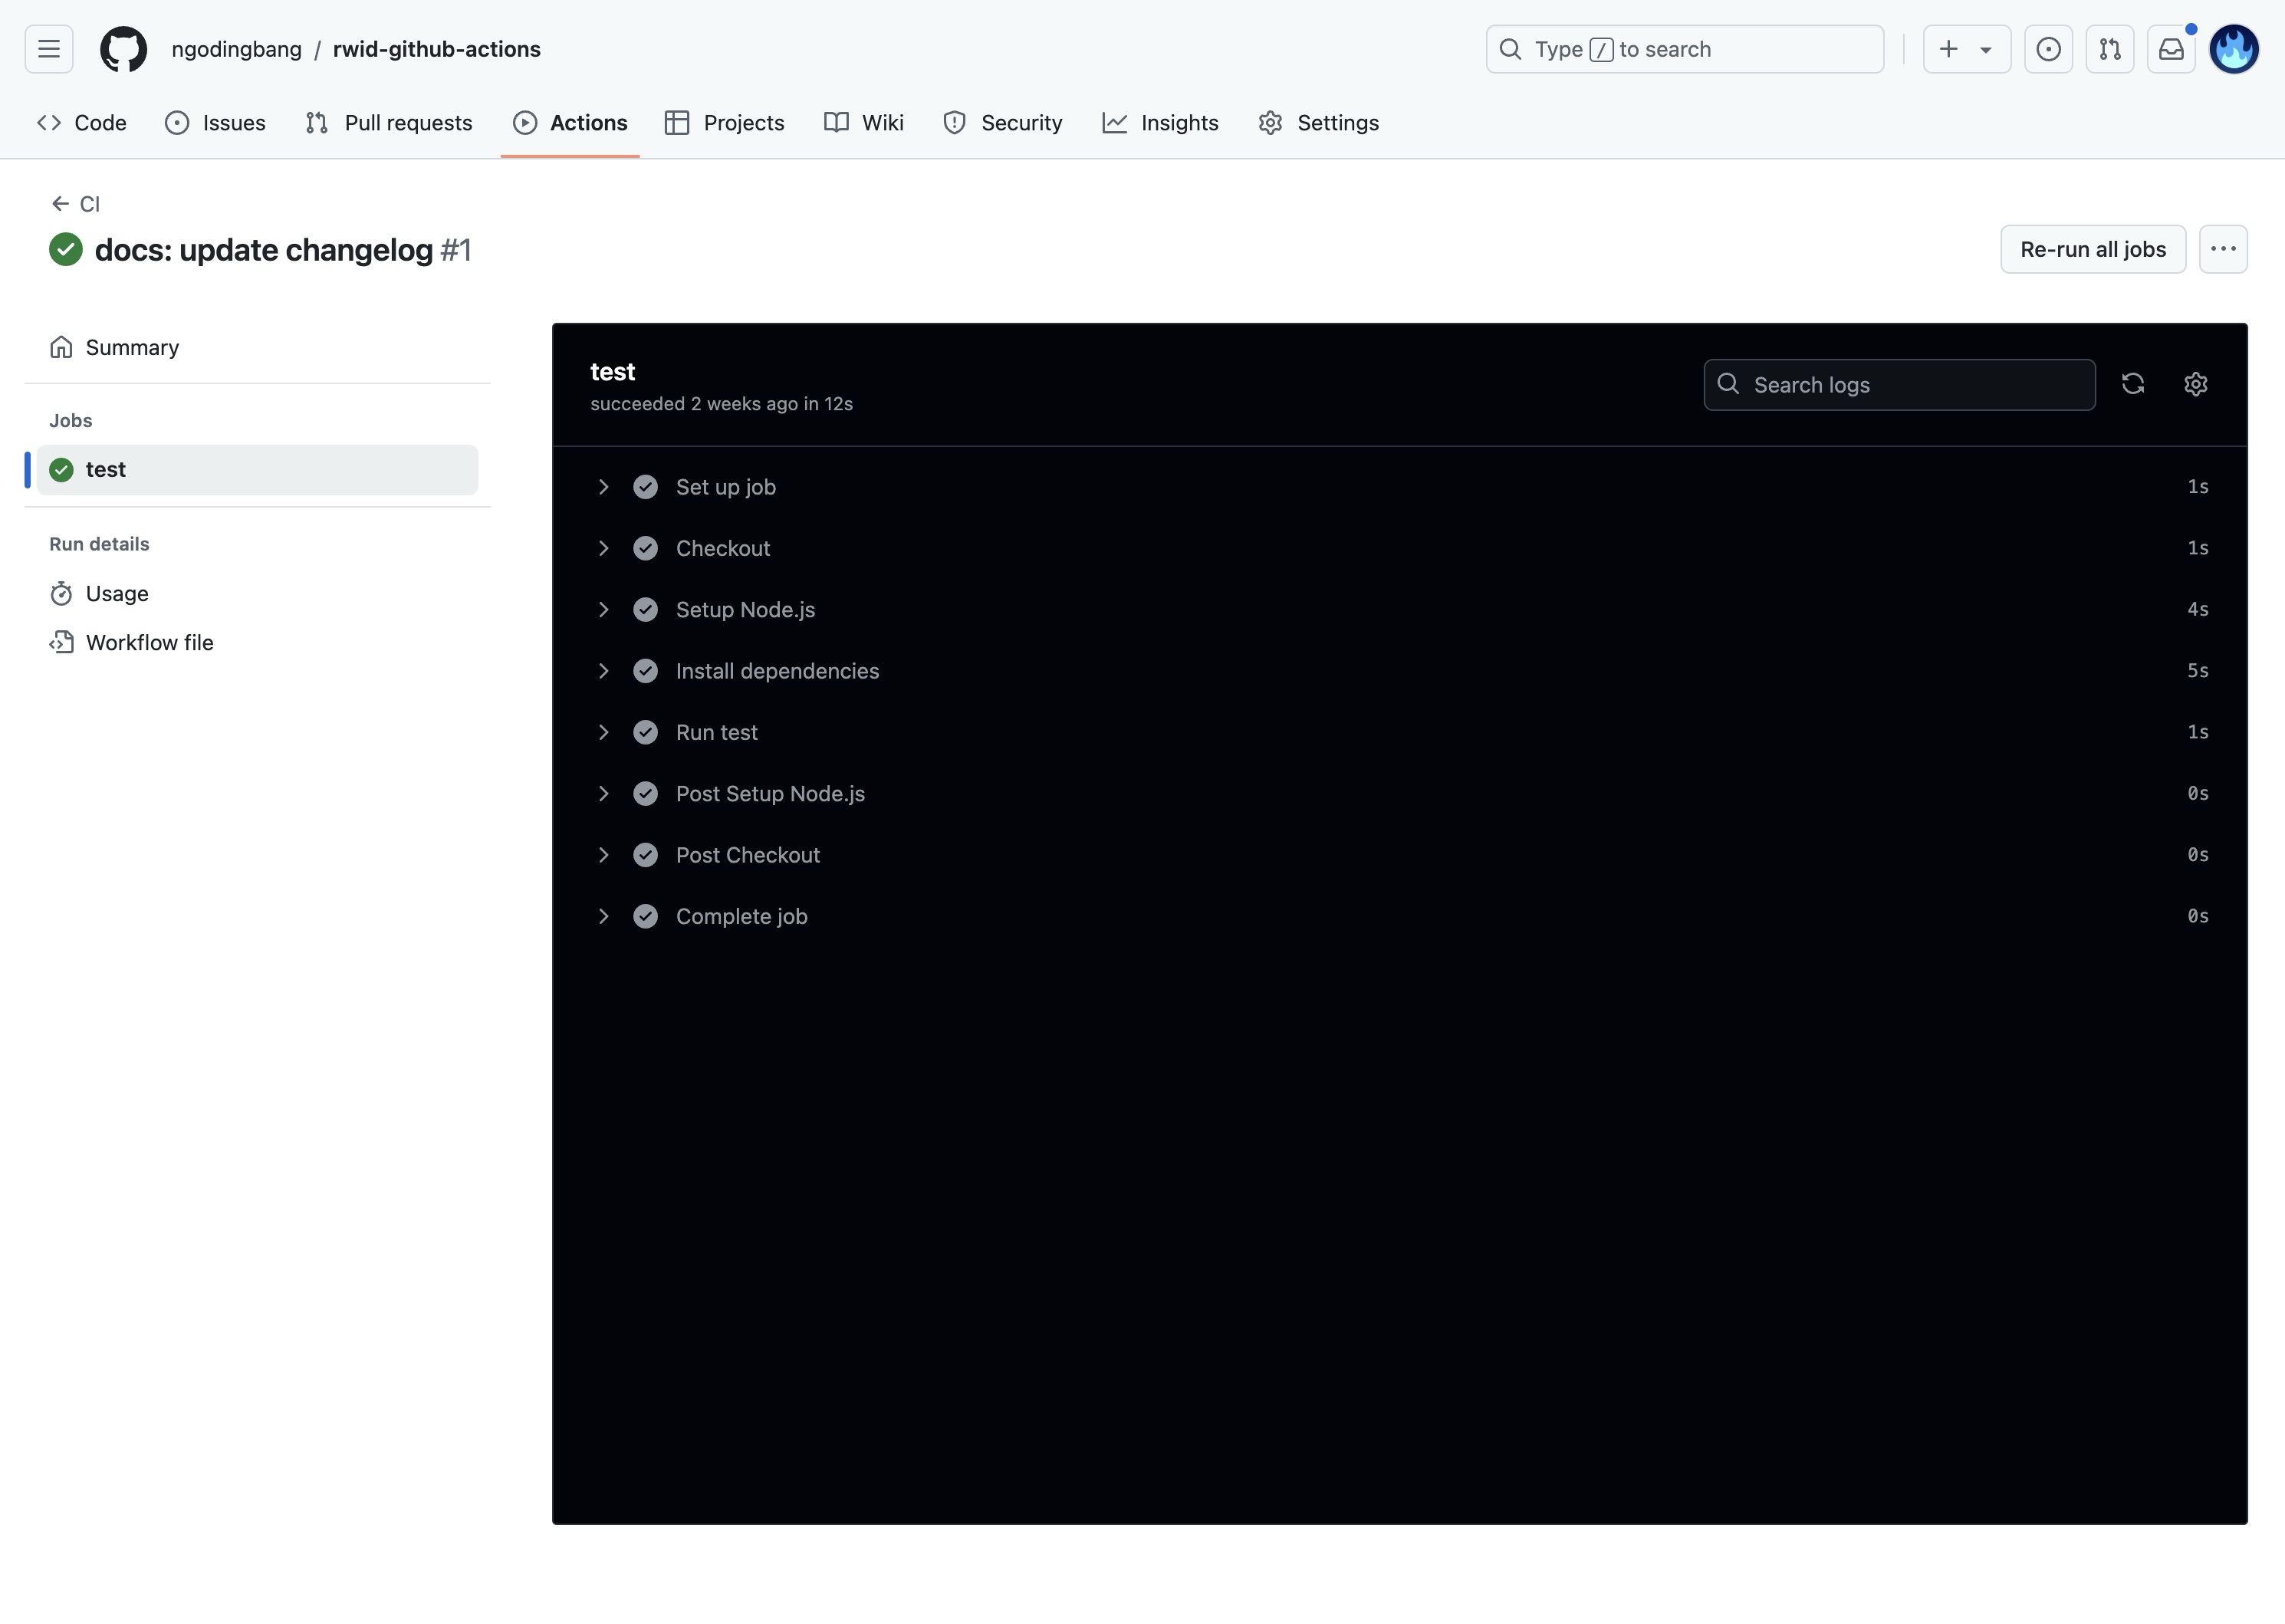
After configuring GitHub Actions, commit the code and push it to the GitHub repository. The pipeline will automatically run, performing the checkout of the repository, installing dependencies, and running unit tests using Jest. If the unit tests pass, the pipeline will display a “Passing” status; if not, it will be marked as “Failing.”
Validation and Debugging
If an error occurs or the pipeline fails, check the error details in GitHub Actions. Some points to consider:
- Ensure that the GitHub Actions configuration file is correct.
- Check if there are any issues in the code or unit tests causing the failure.
Step 3: Adding a Status Badge and Automatic Deployment
Adding a Status Badge to README
A badge is a visual representation of the CI/CD status. To add a badge:
-
Open GitHub and copy the badge URL from the workflow page.
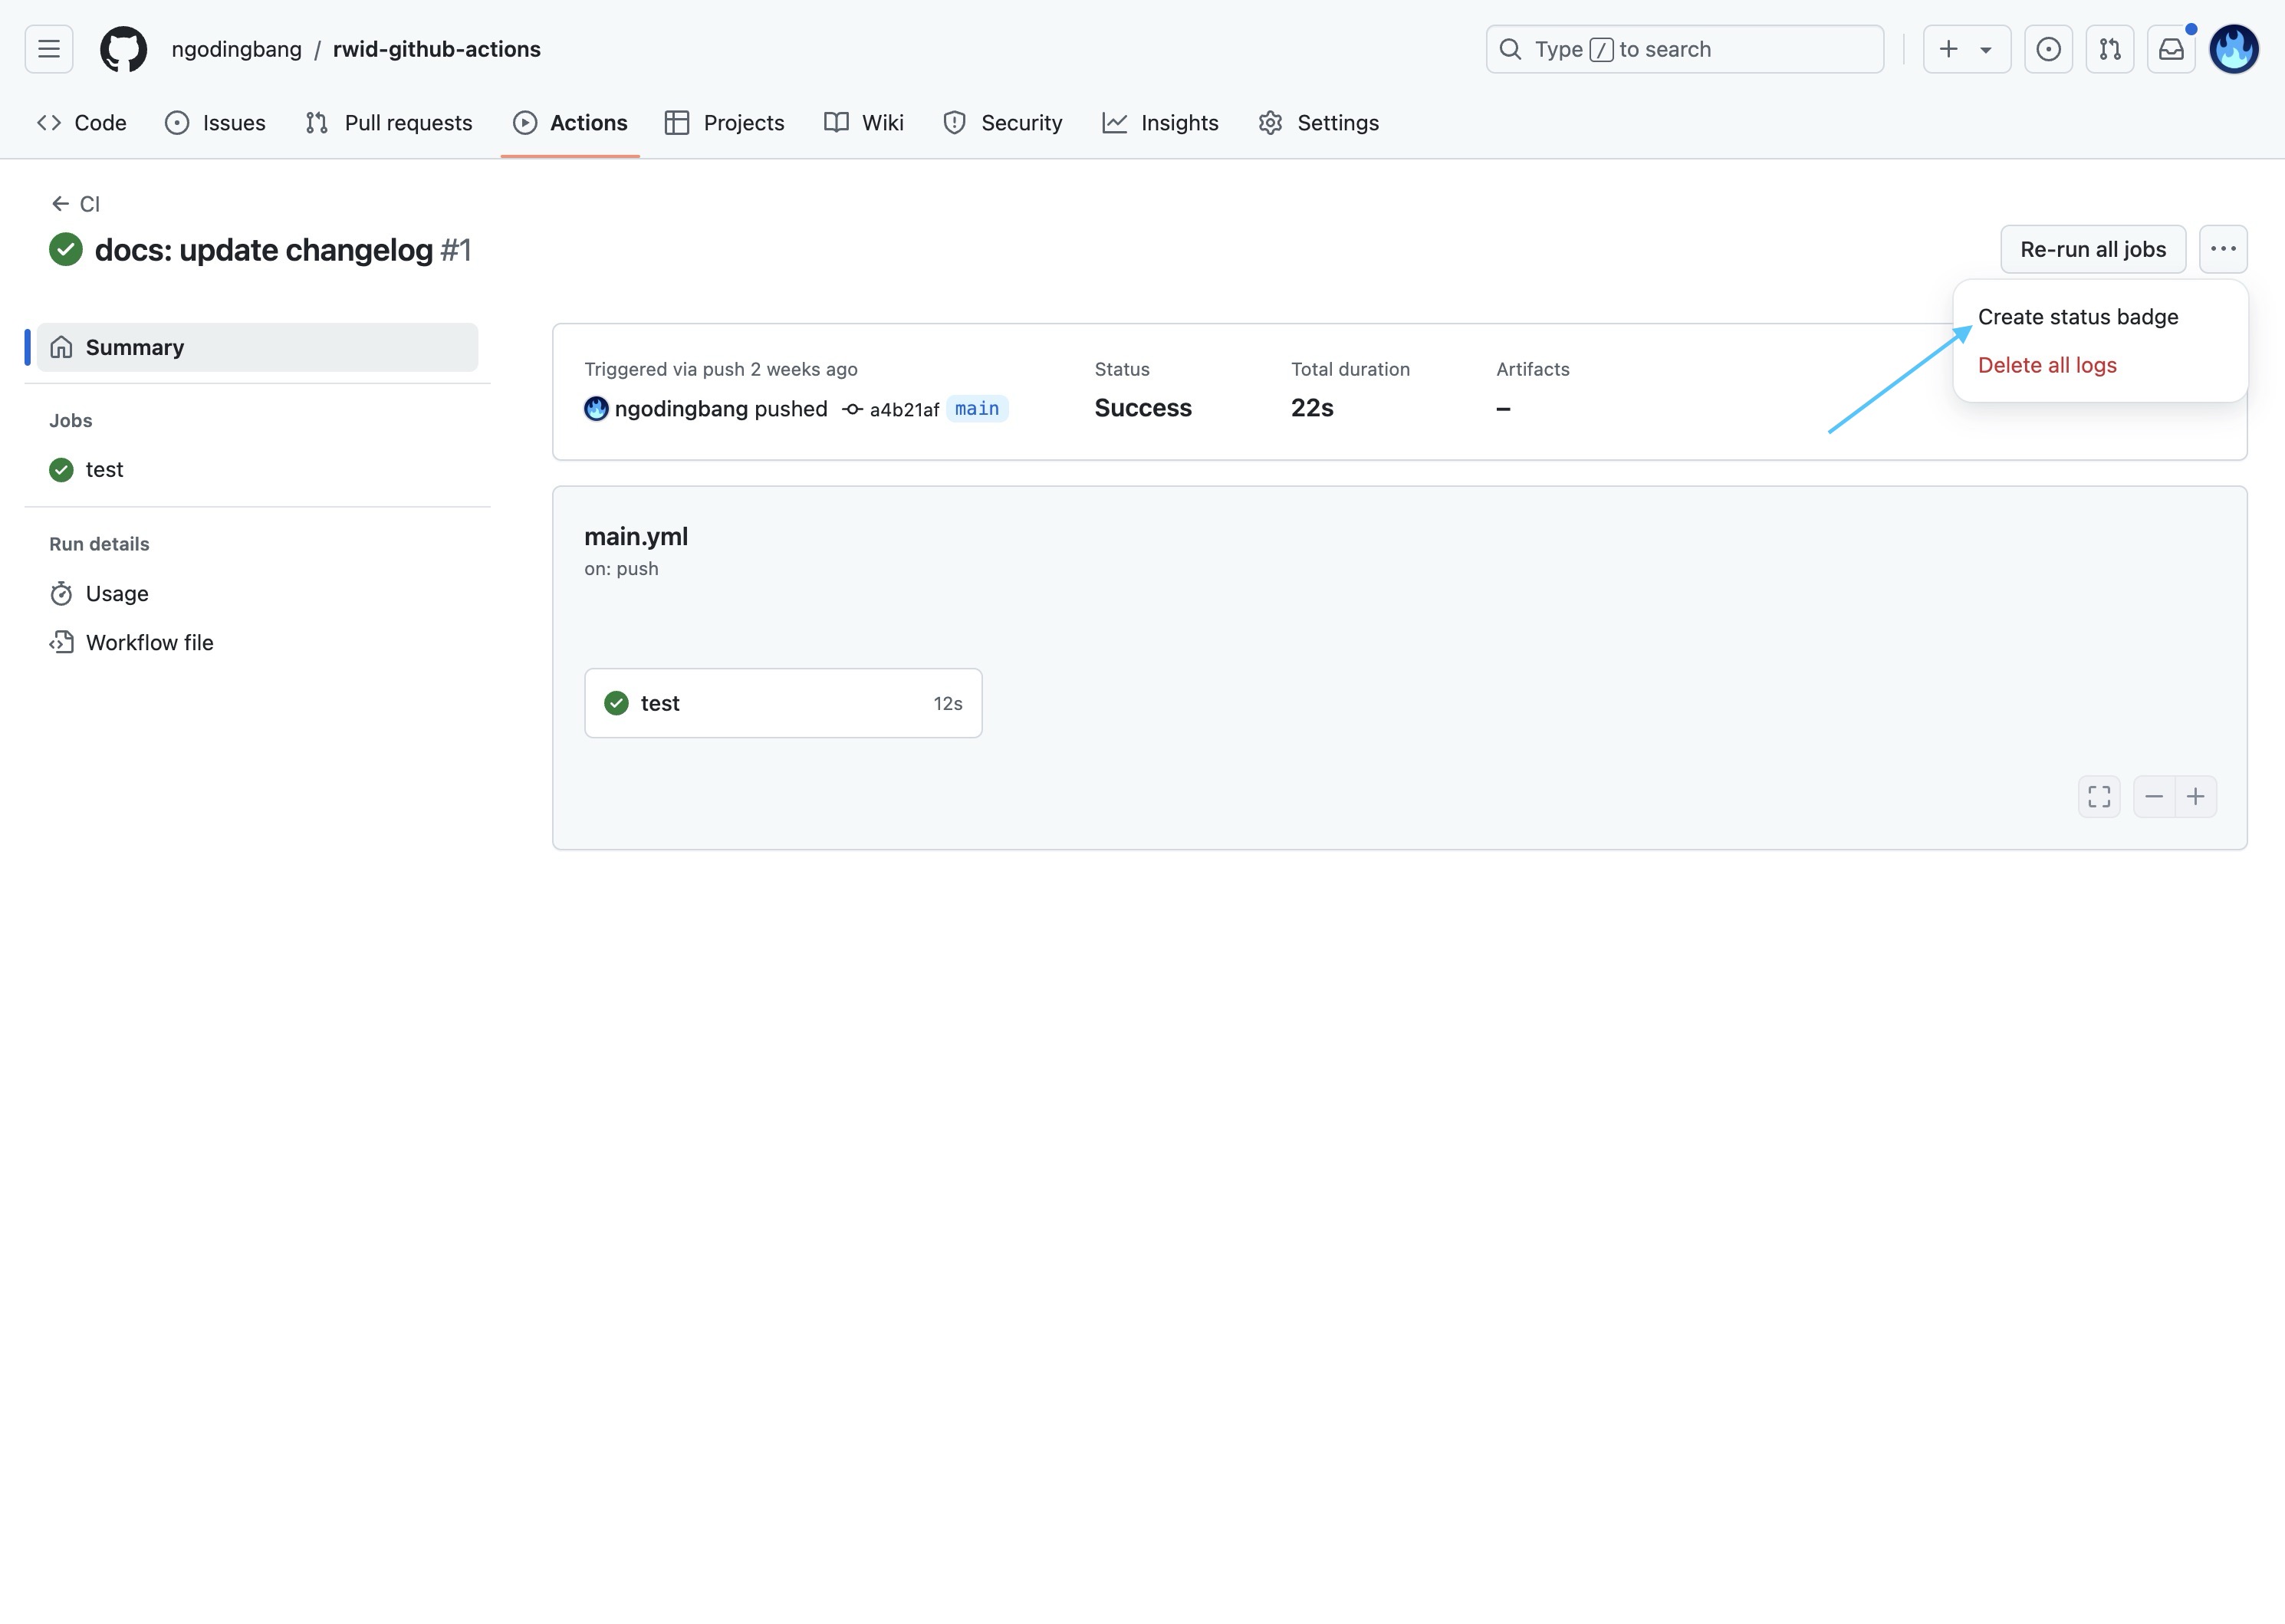
Select the “Create Status Badge” option (Source: https://github.com/ngodingbang/rwid-github-actions/actions/runs/11631016179/job/32391178500) 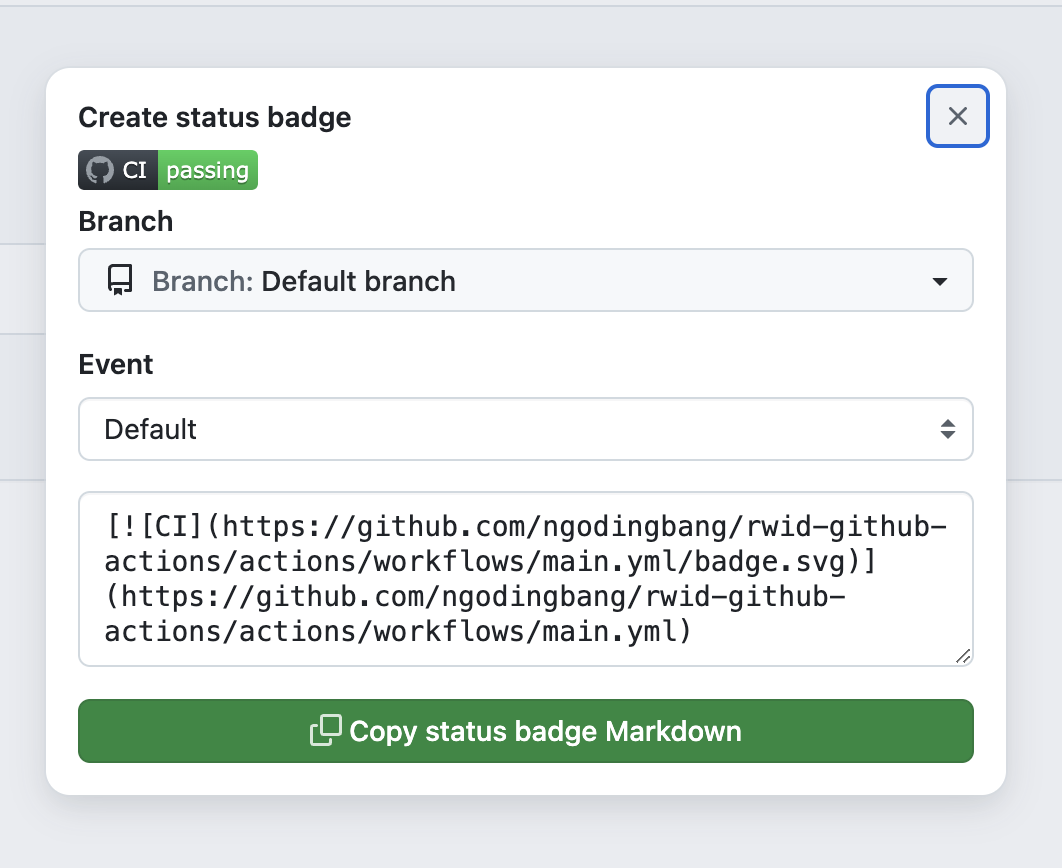
Then click “Copy status badge Markdown”. -
Add the badge to the README.
# RWID GitHub Actions [](https://github.com/ngodingbang/rwid-github-actions/actions/workflows/main.yml)
With this, the workflow status will be displayed directly on the README page. You can check the details here: .
Deploying to Vercel
GitHub Actions is not only for testing but can also be used for automatic deployments. In this example, we are using Vercel as the hosting platform:
-
Create an account on Vercel and connect it to the GitHub repository.
-
Add a deployment step in the existing GitHub Actions configuration file
.github/workflows/main.yml:- name: Deploy to Vercel run: npx vercel --prod --token=$VERCEL_TOKEN
Ensuring Complete Documentation
Documentation in the README is crucial. Make sure the README file includes:
- Project description.
- Installation guide.
- Status badge.
- How to run tests.
- Deployment guide.
Conclusion
By following this guide, we have successfully implemented a CI/CD pipeline using GitHub Actions, TypeScript, and Jest. CI/CD helps increase productivity and maintain code quality by ensuring that every change is tested before being deployed to the production environment. We hope this article provides a clear overview of the importance of CI/CD in software development and how to implement it. The source code of this article can be checked below.
https://github.com/ngodingbang/rwid-github-actions
Happy coding, and good luck! 🚀
