Creating Unit Tests Using Vitest and Integrating with GitHub Actions
You may want to read this article in Bahasa Indonesia version: Membuat Unit Test Menggunakan Vitest dan Mengintegrasikan dengan GitHub Actions
Introduction
Testing is an essential part of quality application development, ensuring the code works as expected and preventing regressions as the application evolves. In this article, we will learn how to implement unit testing using Vitest - a fast testing framework that integrates seamlessly with Vite-then connect it with codecov.io to get a visual report on how well our tests cover the application code, and finally automate this entire process with GitHub Actions so that the tests will run automatically whenever there are code changes, ensuring the quality of the application is maintained without manual intervention.
Prerequisites
Before continuing, make sure you have checked the previous part here:
- Implementing Code Coverage in GitHub Actions Using Codecov
- Adding Linter and Formatter to TypeScript Project
Step 1: Installing Vitest
Let’s install Vitest and the plugin for coverage:
pnpm add -D vitest @vitest/coverage-v8Step 2: Configuring Vitest
Add the Vitest configuration to the vite.config.ts file:
import { defineConfig, loadEnv } from "vite";
import tsconfigPaths from "vite-tsconfig-paths";

export default defineConfig(({ mode }) => {
  const env = loadEnv(mode, process.cwd());

  return {
    plugins: [tsconfigPaths()],
    base: env.VITE_ASSET_URL || "/",
    test: {
      globals: true,
      environment: "jsdom",
      coverage: {
        provider: "v8",
        reporter: ["text", "json", "html"],
        exclude: ["node_modules/", "tests/"],
      },
    },
  };
});
Step 3: Adding Testing Script in package.json
Add scripts to run tests and coverage in package.json:
{
  "scripts": {
    "dev": "vite",
    "build": "tsc && vite build",
    "preview": "vite preview",
    "lint": "eslint . --ext .ts",
    "format": "prettier --write \"**/*.{css,js,json,jsx,ts,tsx}\"",
    "test": "vitest run",
    "coverage": "vitest run --coverage"
  }
}
Step 4: Creating Simple Unit Tests
Create a tests folder at the root of the project and add simple test files:
import { describe, it, expect } from "vitest";

describe("Example test", () => {
  it("should pass", () => {
    expect(1 + 1).toBe(2);
  });
});
Step 5: Integrating with GitHub Actions
GitHub Actions allows us to automate the build, test, and deployment process. Create a .github/workflows folder and add a main.yml file:
name: CI & CD

on:
  push:
    branches:
      - main
  workflow_dispatch:
  pull_request:

permissions:
  contents: read
  pages: write
  id-token: write

concurrency:
  group: "pages"
  cancel-in-progress: true

env:
  NODE_VERSION: 22.14.0
  PNPM_VERSION: 10.8.1

jobs:
  test:
    runs-on: ubuntu-latest

    steps:
      - name: Checkout
        uses: actions/checkout@v4

      - name: Install pnpm
        uses: pnpm/action-setup@v4
        with:
          version: ${{ env.PNPM_VERSION }}

      - name: Setup Node.js
        uses: actions/setup-node@v4
        with:
          node-version: ${{ env.NODE_VERSION }}
          cache: "pnpm"

      - name: Install dependencies
        run: pnpm install

      - name: Run test with coverage
        run: pnpm run coverage

      - name: Upload results to Codecov
        uses: codecov/codecov-action@v4
        with:
          token: ${{ secrets.CODECOV_TOKEN }}
          fail_ci_if_error: true

      - name: Build
        run: pnpm run build
        env:
          VITE_ASSET_URL: ${{ secrets.VITE_ASSET_URL }}

      - name: Setup Pages
        uses: actions/configure-pages@v4

      - name: Upload artifact
        uses: actions/upload-pages-artifact@v3
        with:
          path: ./dist

  deploy:
    environment:
      name: github-pages
      url: ${{ steps.deployment.outputs.page_url }}

    runs-on: ubuntu-latest

    needs: test

    steps:
      - name: Deploy to GitHub Pages
        id: deployment
        uses: actions/deploy-pages@v4
In simple terms, the script above will work in the following order.
- When there is a push to the main branch or a pull request is made, the workflow will run.
- The
testjob will:- Install PNPM and Node.js
- Install project dependencies
- Run tests with coverage
- Upload the coverage results to Codecov
- Build the project
- Setting up and uploading build results for GitHub Pages
- After the
testjob completes, thedeployjob will deploy the build to GitHub Pages.
Step 6: Integrating with Codecov
Codecov is a platform that helps track code coverage. For details on how to connect Codecov with your GitHub repository, you can check out the article I’ve written previously below.
Implementasi Code Coverage di GitHub Actions Menggunakan Codecov
Step 7: Adding Badges to README.md
Add the GitHub Actions and Codecov badges to the README.md file to display the build status and code coverage.
# Nama Projek
[](LICENSE.md)
[](https://github.com/username/project/actions/workflows/main.yml)
[](https://codecov.io/gh/username/project)
Your project description.Step 8: Adding a More Complex Test File
Let’s add a code example about a simple calculation. Please create a new file in src/utils/calculator.ts like the example below.
export function add(a: number, b: number): number {
  return a + b;
}

export function subtract(a: number, b: number): number {
  return a - b;
}

export function multiply(a: number, b: number): number {
  return a * b;
}

export function divide(a: number, b: number): number {
  if (b === 0) {
    throw new Error("Division by zero");
  }

  return a / b;
}
To check whether the execution result of the above code is in line with our expectations or not, we need to add a new unit test in tests/utils/calculator.test.ts like the example below.
import { describe, it, expect } from "vitest";
import { add, subtract, multiply, divide } from "@/src/utils/calculator";

describe("Calculator", () => {
  describe("add", () => {
    it("should add two positive numbers", () => {
      expect(add(1, 2)).toBe(3);
    });

    it("should add a positive and a negative number", () => {
      expect(add(1, -2)).toBe(-1);
    });
  });

  describe("subtract", () => {
    it("should subtract two positive numbers", () => {
      expect(subtract(3, 2)).toBe(1);
    });

    it("should subtract a negative from a positive number", () => {
      expect(subtract(3, -2)).toBe(5);
    });
  });

  describe("multiply", () => {
    it("should multiply two positive numbers", () => {
      expect(multiply(2, 3)).toBe(6);
    });

    it("should multiply a positive and a negative number", () => {
      expect(multiply(2, -3)).toBe(-6);
    });
  });

  describe("divide", () => {
    it("should divide two positive numbers", () => {
      expect(divide(6, 3)).toBe(2);
    });

    it("should throw an error when dividing by zero", () => {
      expect(() => divide(6, 0)).toThrow("Division by zero");
    });
  });
});
Step 9: Run the Test Locally
There are 2 options we can use to run the above unit test using Vitest:
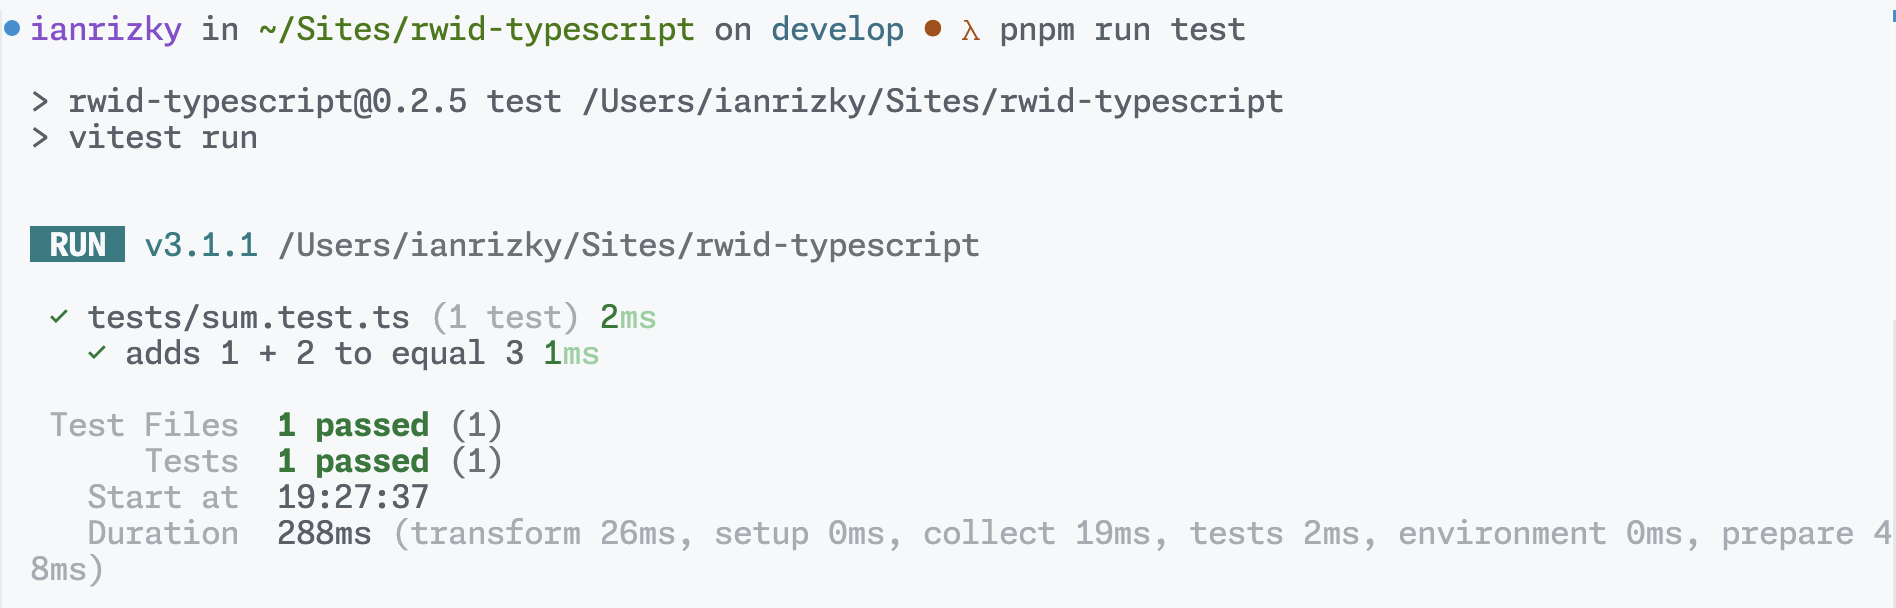
-
Regular test.
pnpm run testThe results can be seen in the example below.
-
Test with code coverage analysis.
pnpm run coverageThe results can be seen in the example below.
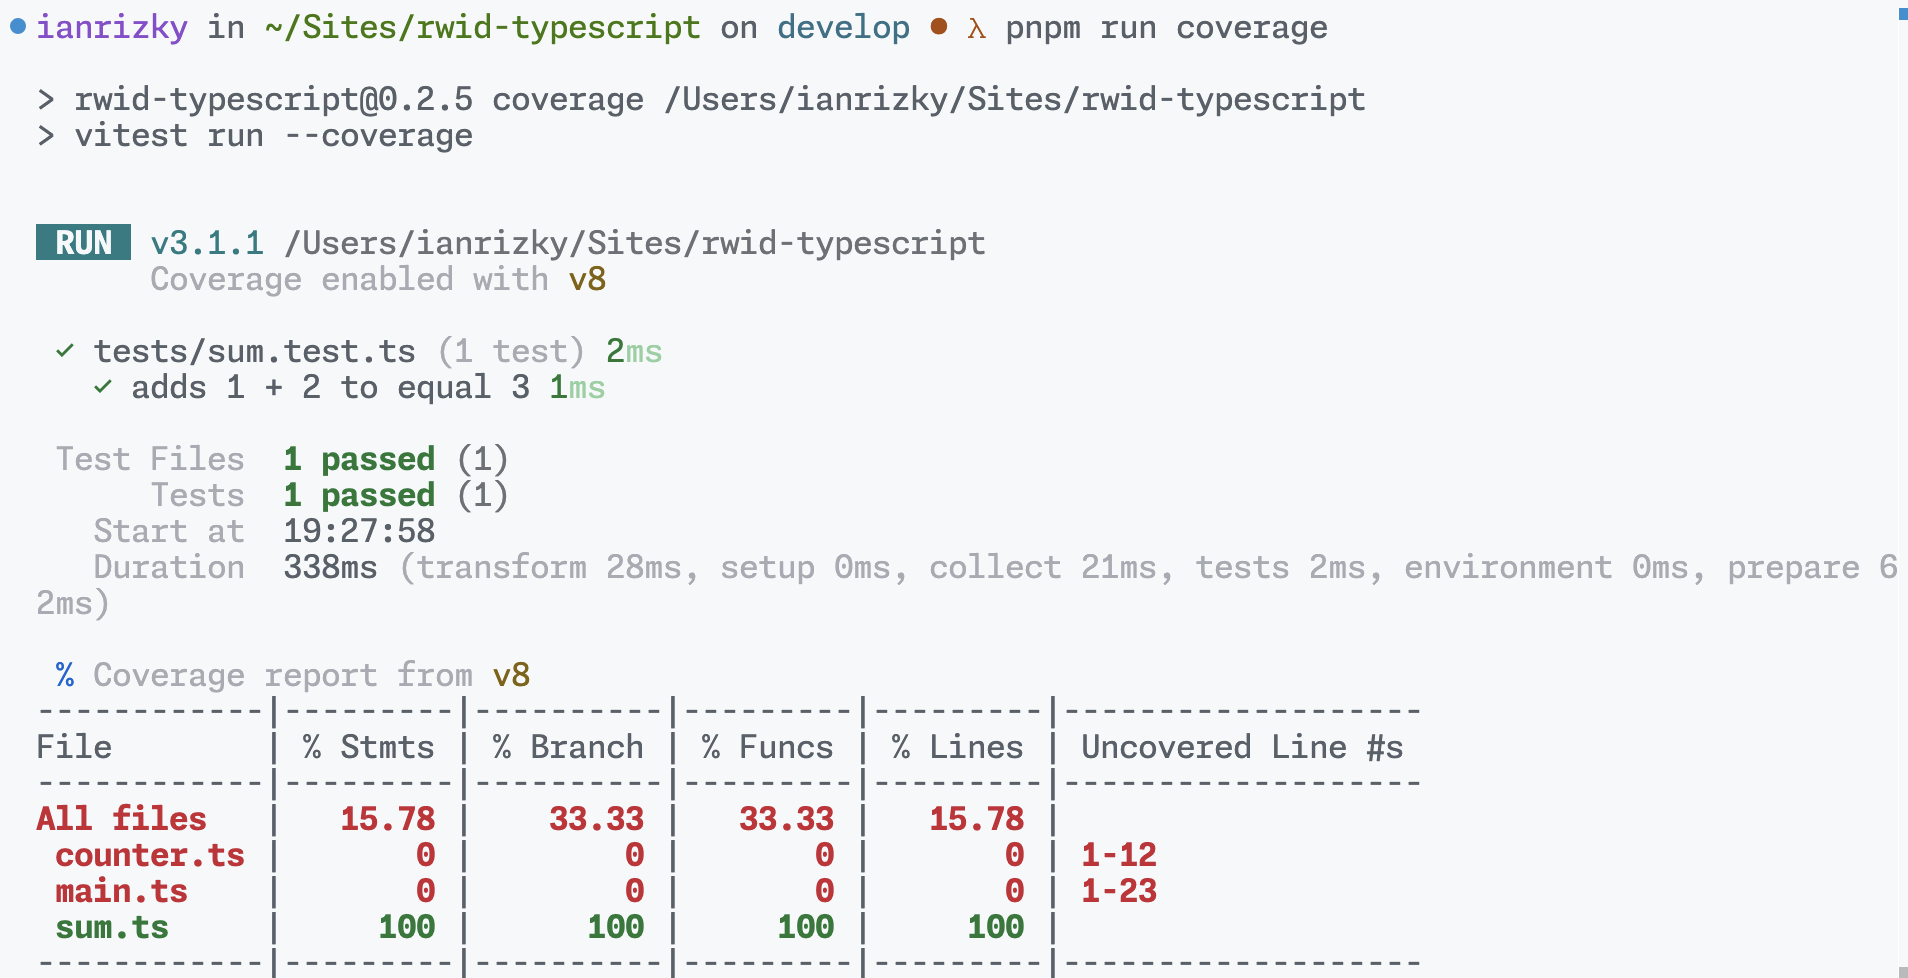
The results of both scripts, both ordinary tests and by adding the code coverage option, are equally successful and show the same number of passes (1 passed). It’s just that there is an additional coverage report on pnpm run coverage.
Step 10: Uploading the Project to GitHub
Now we need to create a new repository on GitHub, initialize Git on your local project, and push the project to GitHub.
git init
git add .
git commit -m "Initial commit"
git branch -M main
git remote add origin https://github.com/username/project.git
git push -u origin main
Please replace https://github.com/username/project.git according to the remote URL you created earlier.
You can check the complete guide directly in the official GitHub documentation at https://docs.github.com/en/repositories/creating-and-managing-repositories/creating-a-new-repository.
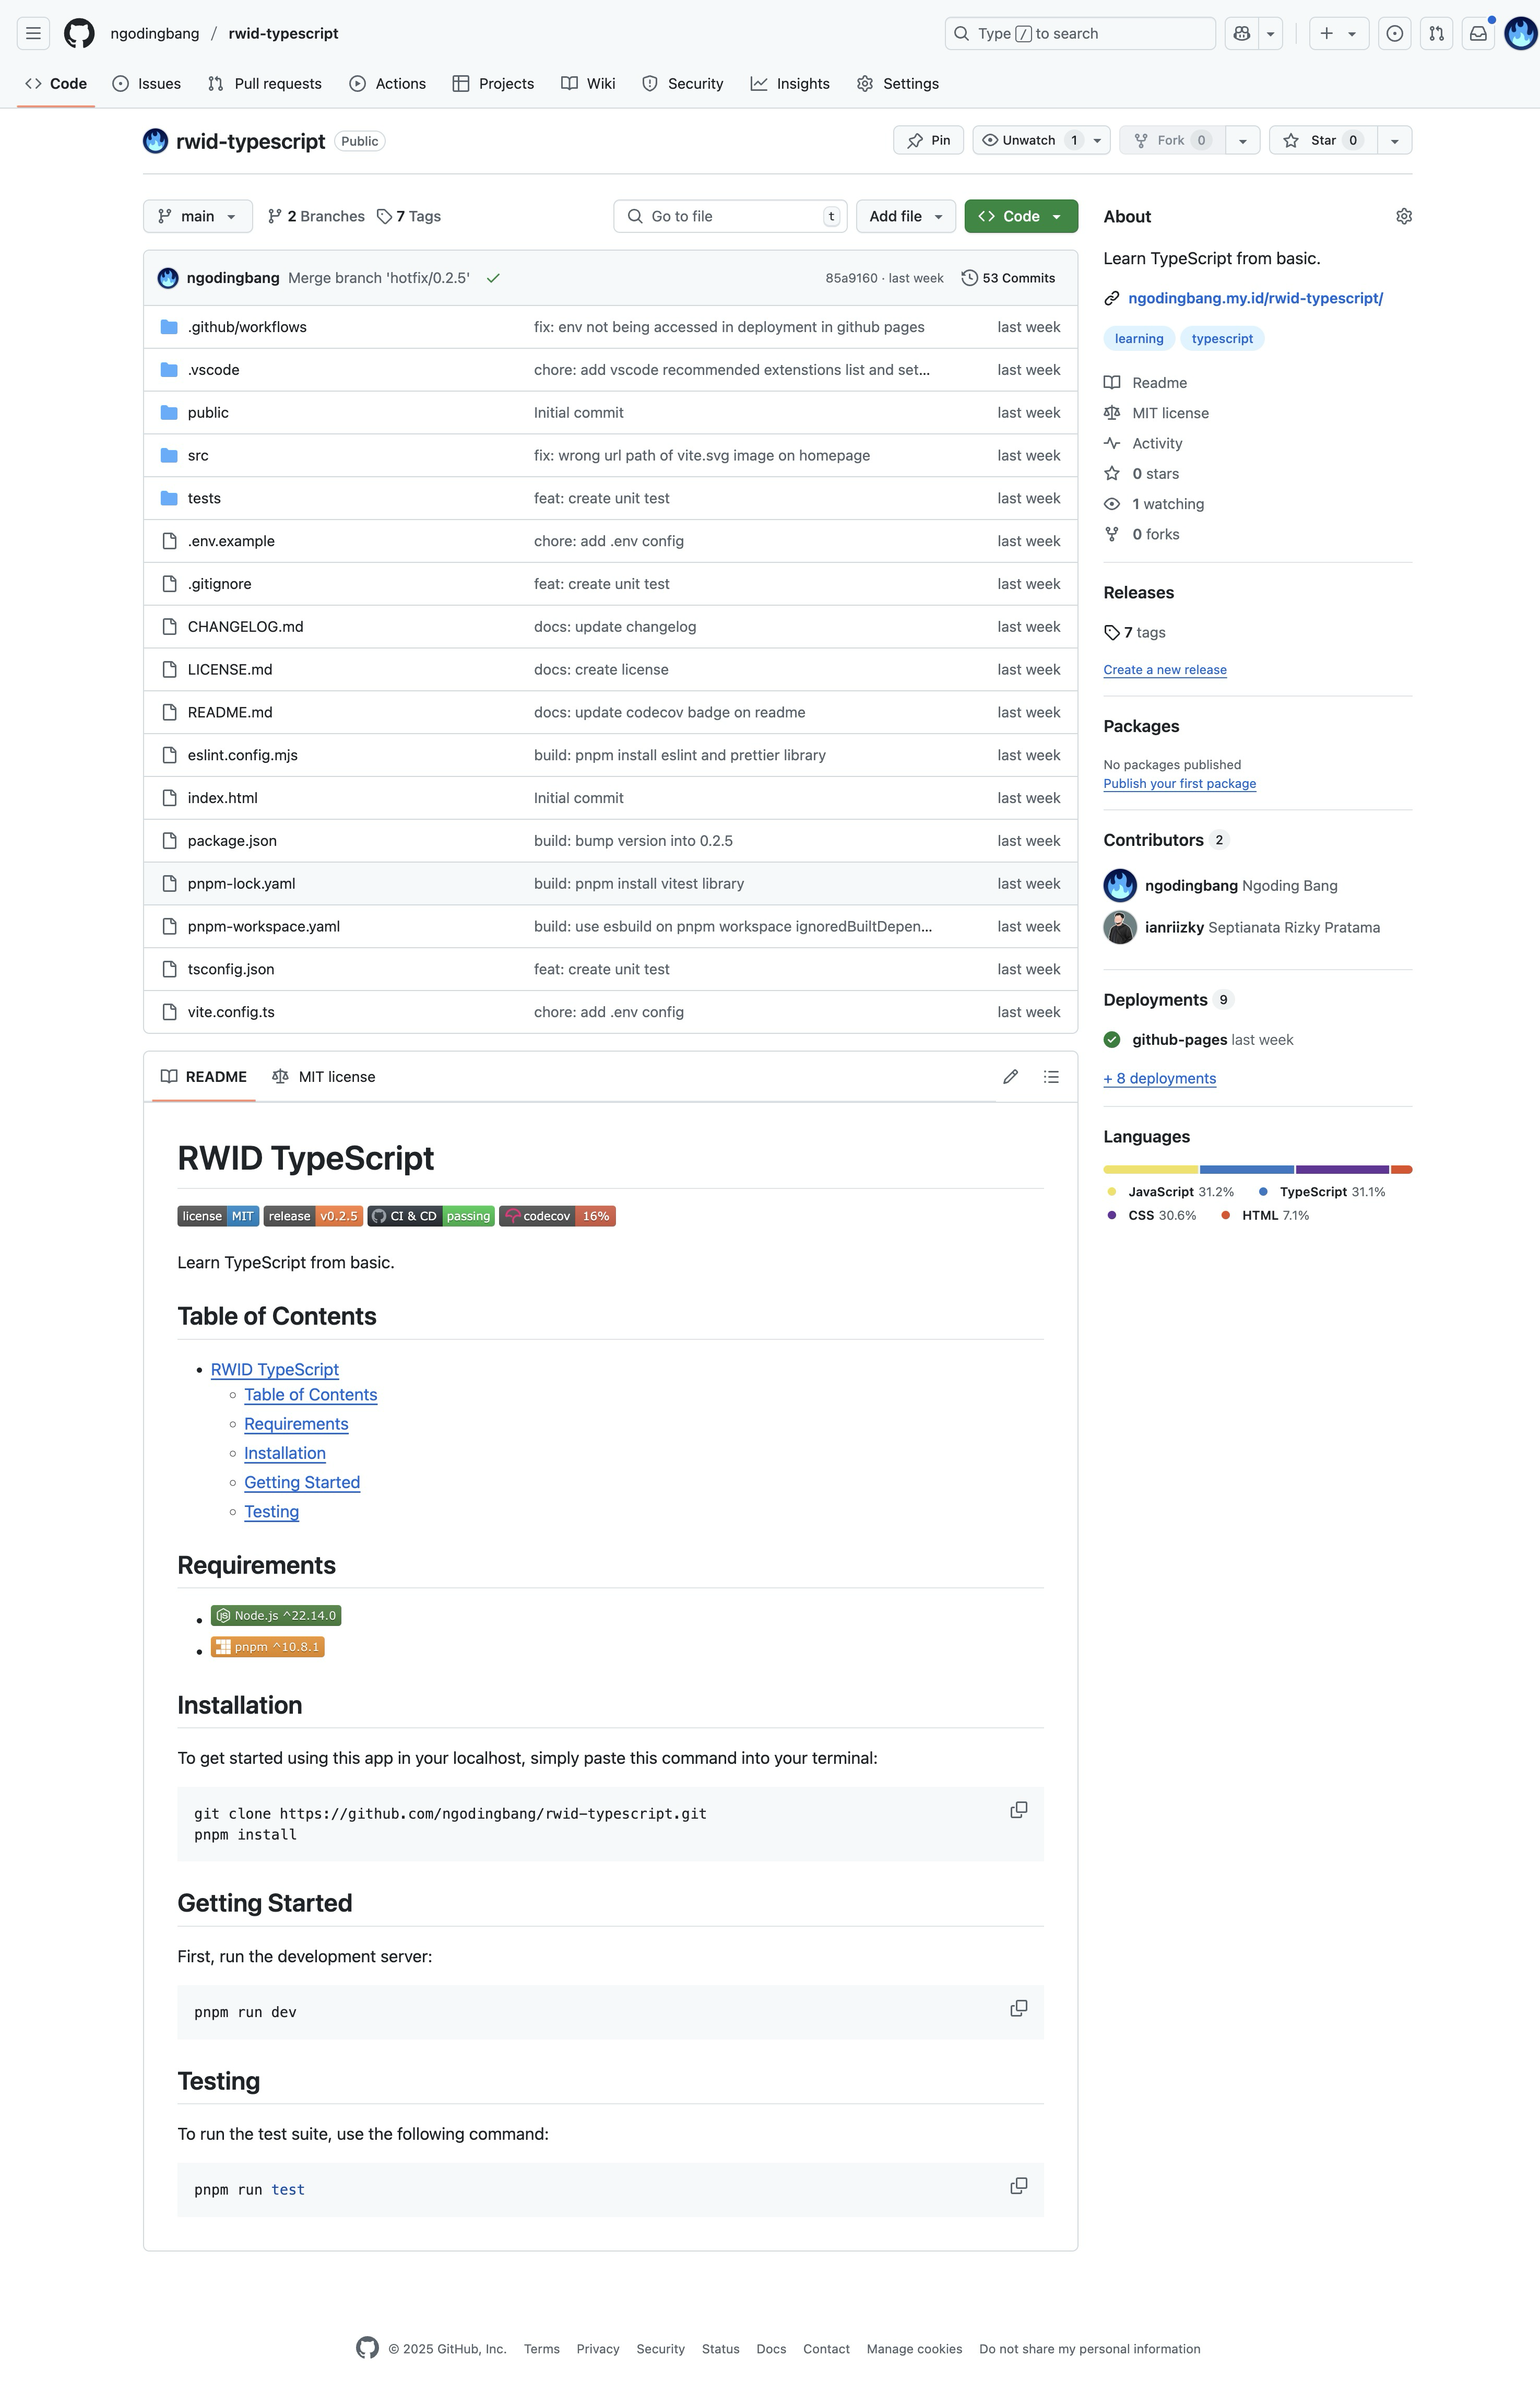
Here is an example of a project that I pushed directly to my own GitHub at https://github.com/ngodingbang/rwid-typescript.
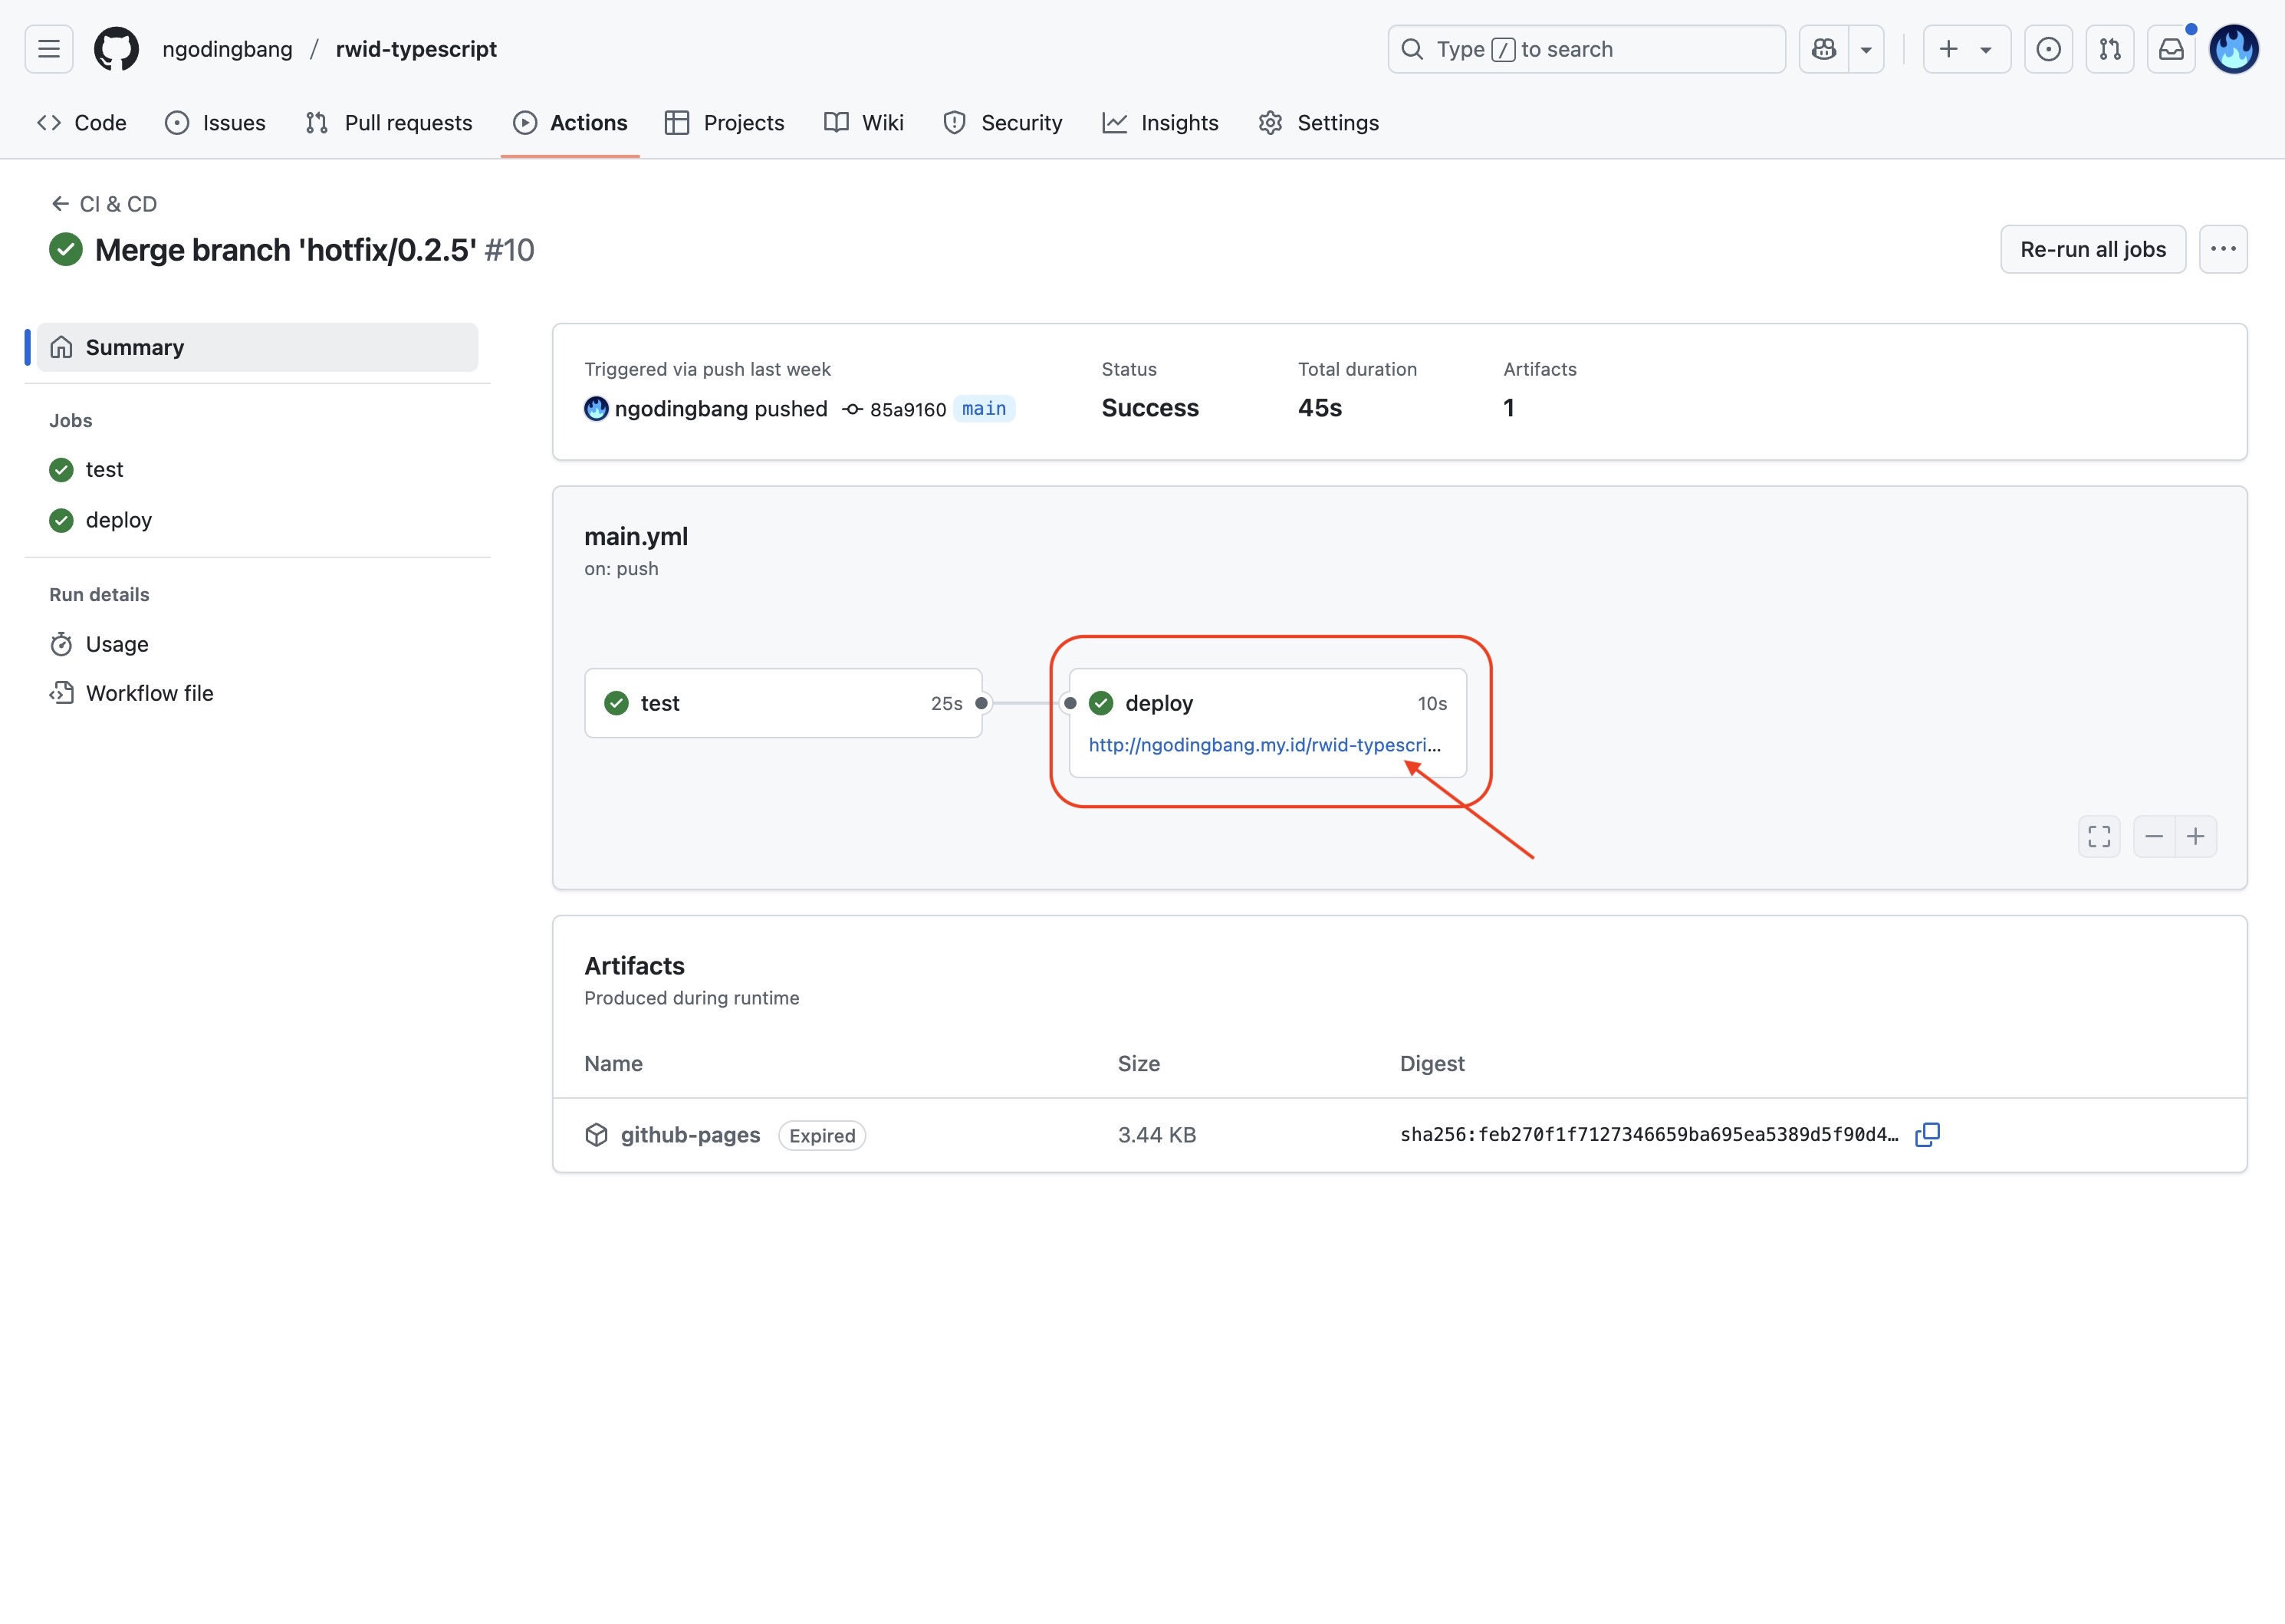
When you successfully push your project to the GitHub repository, the GitHub Actions script that we have added in .github/workflows/main.yml will automatically run like the example below.
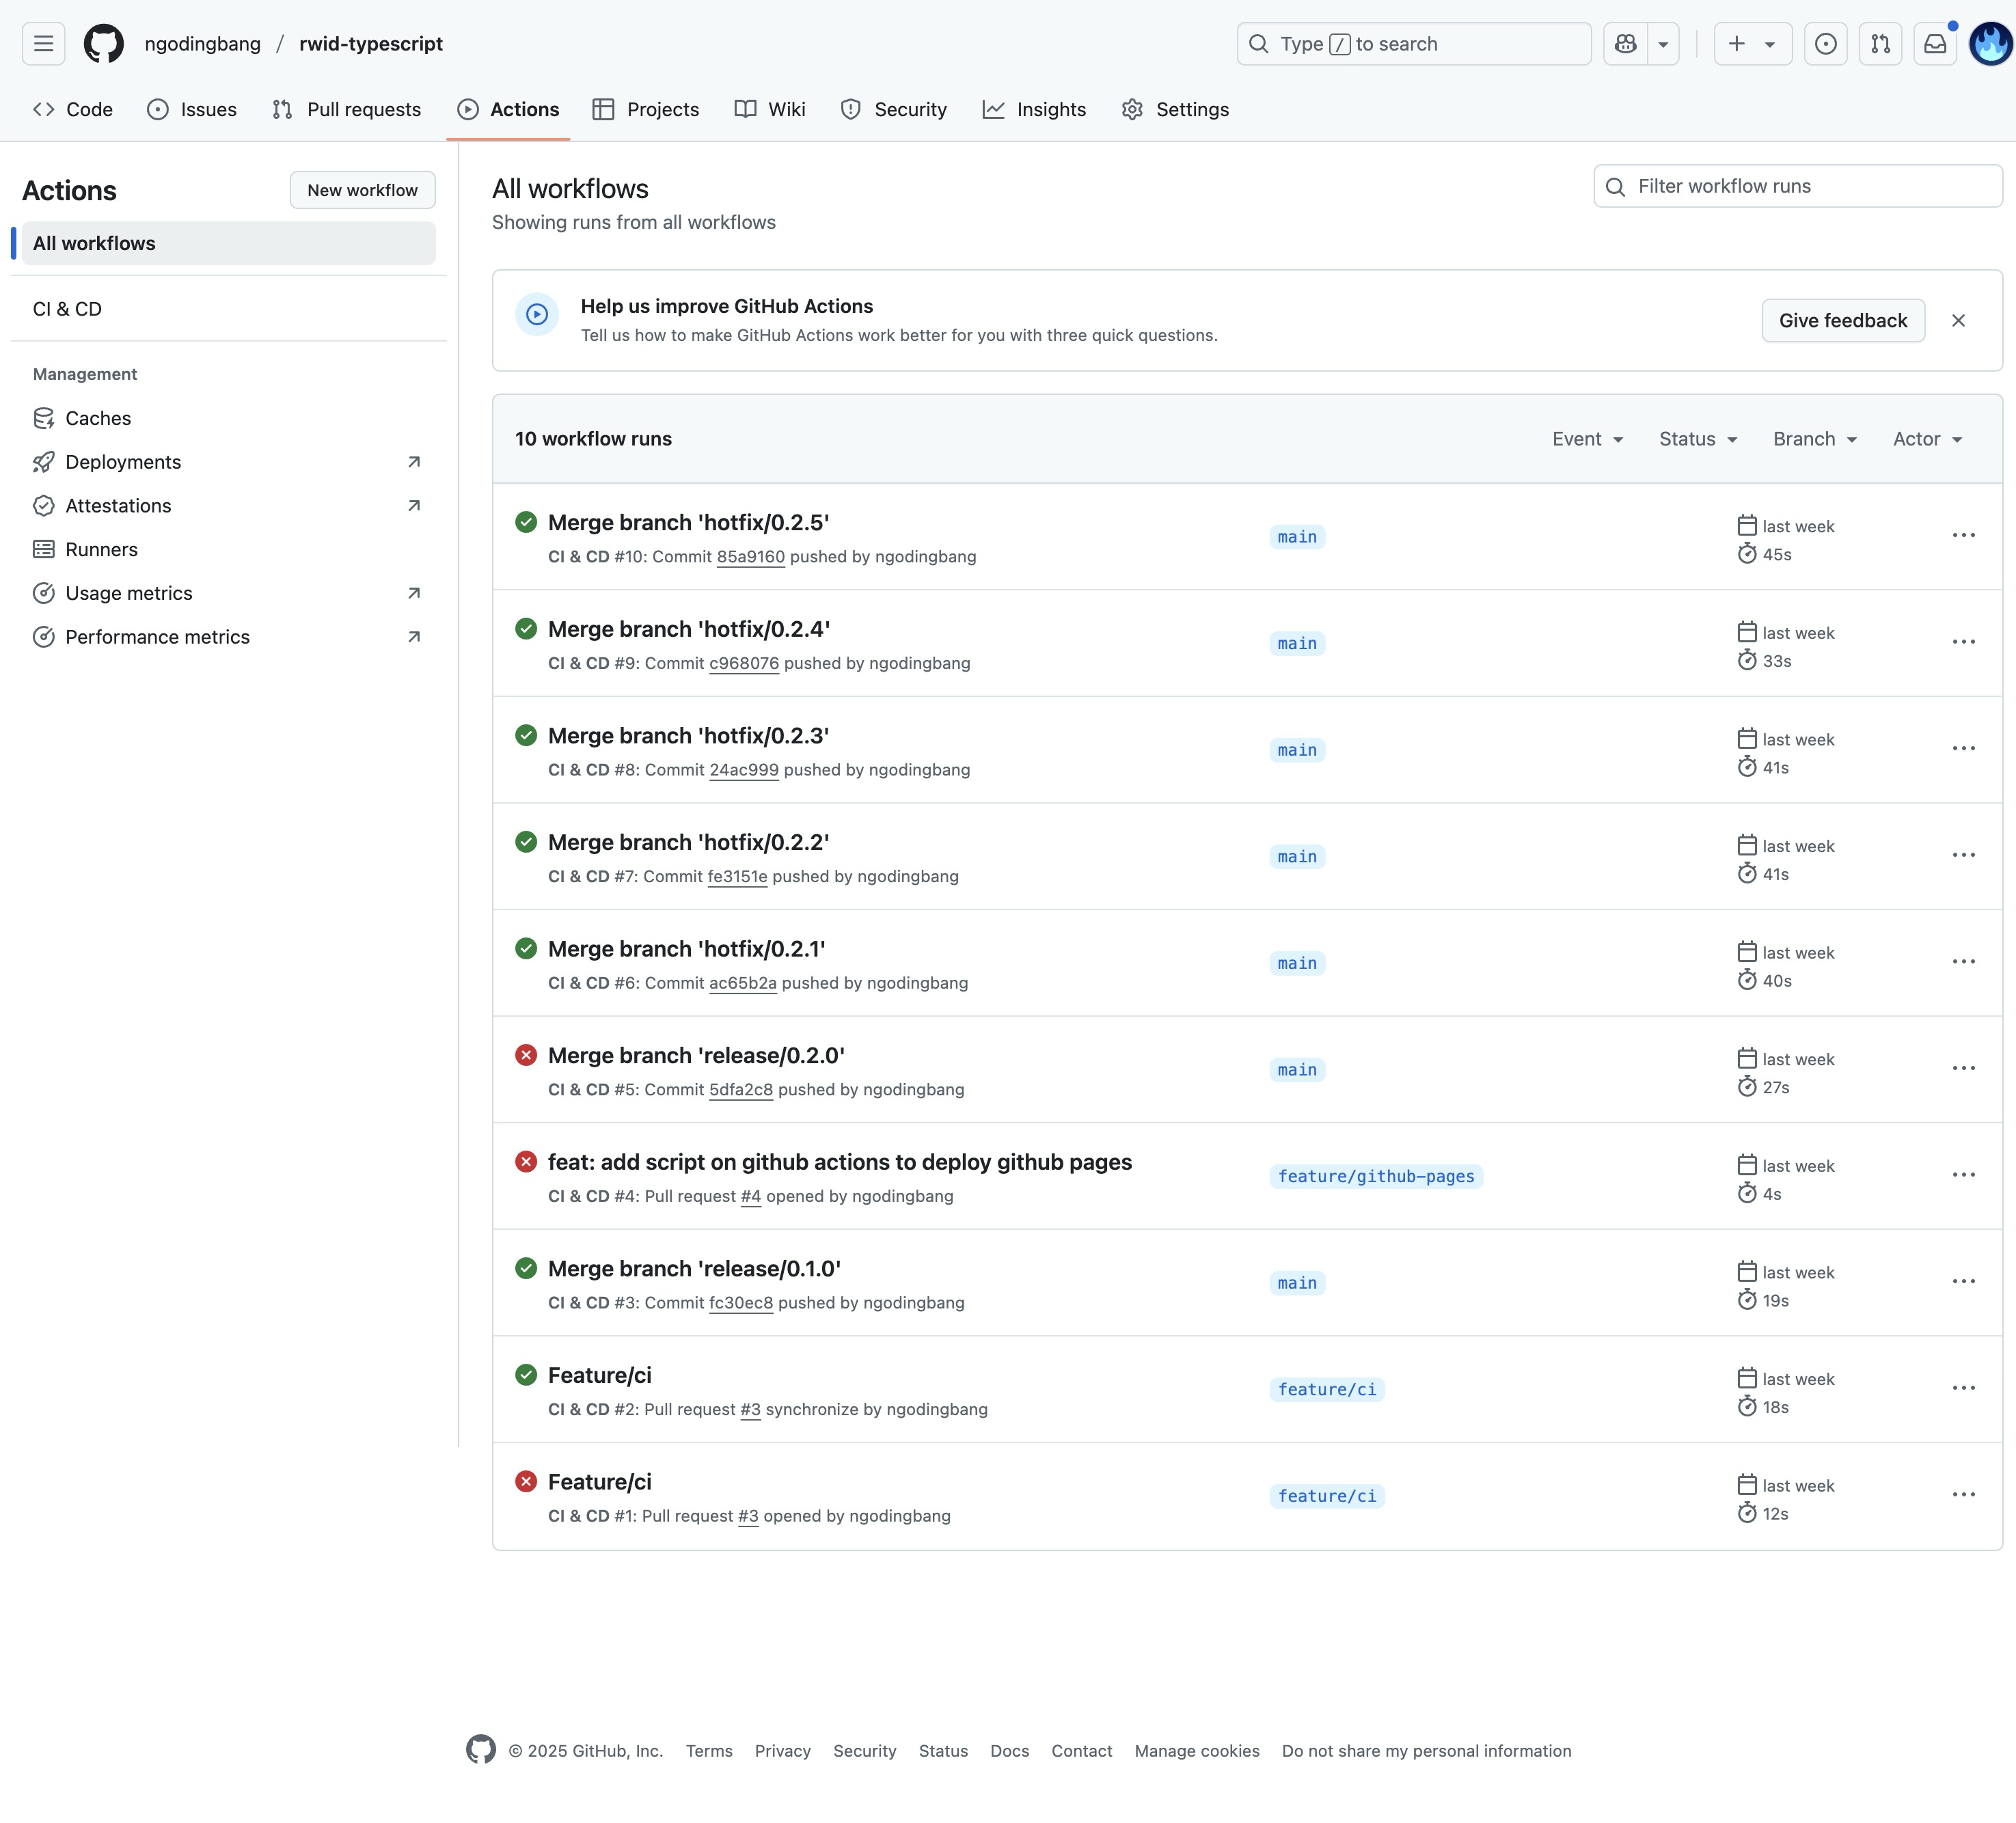
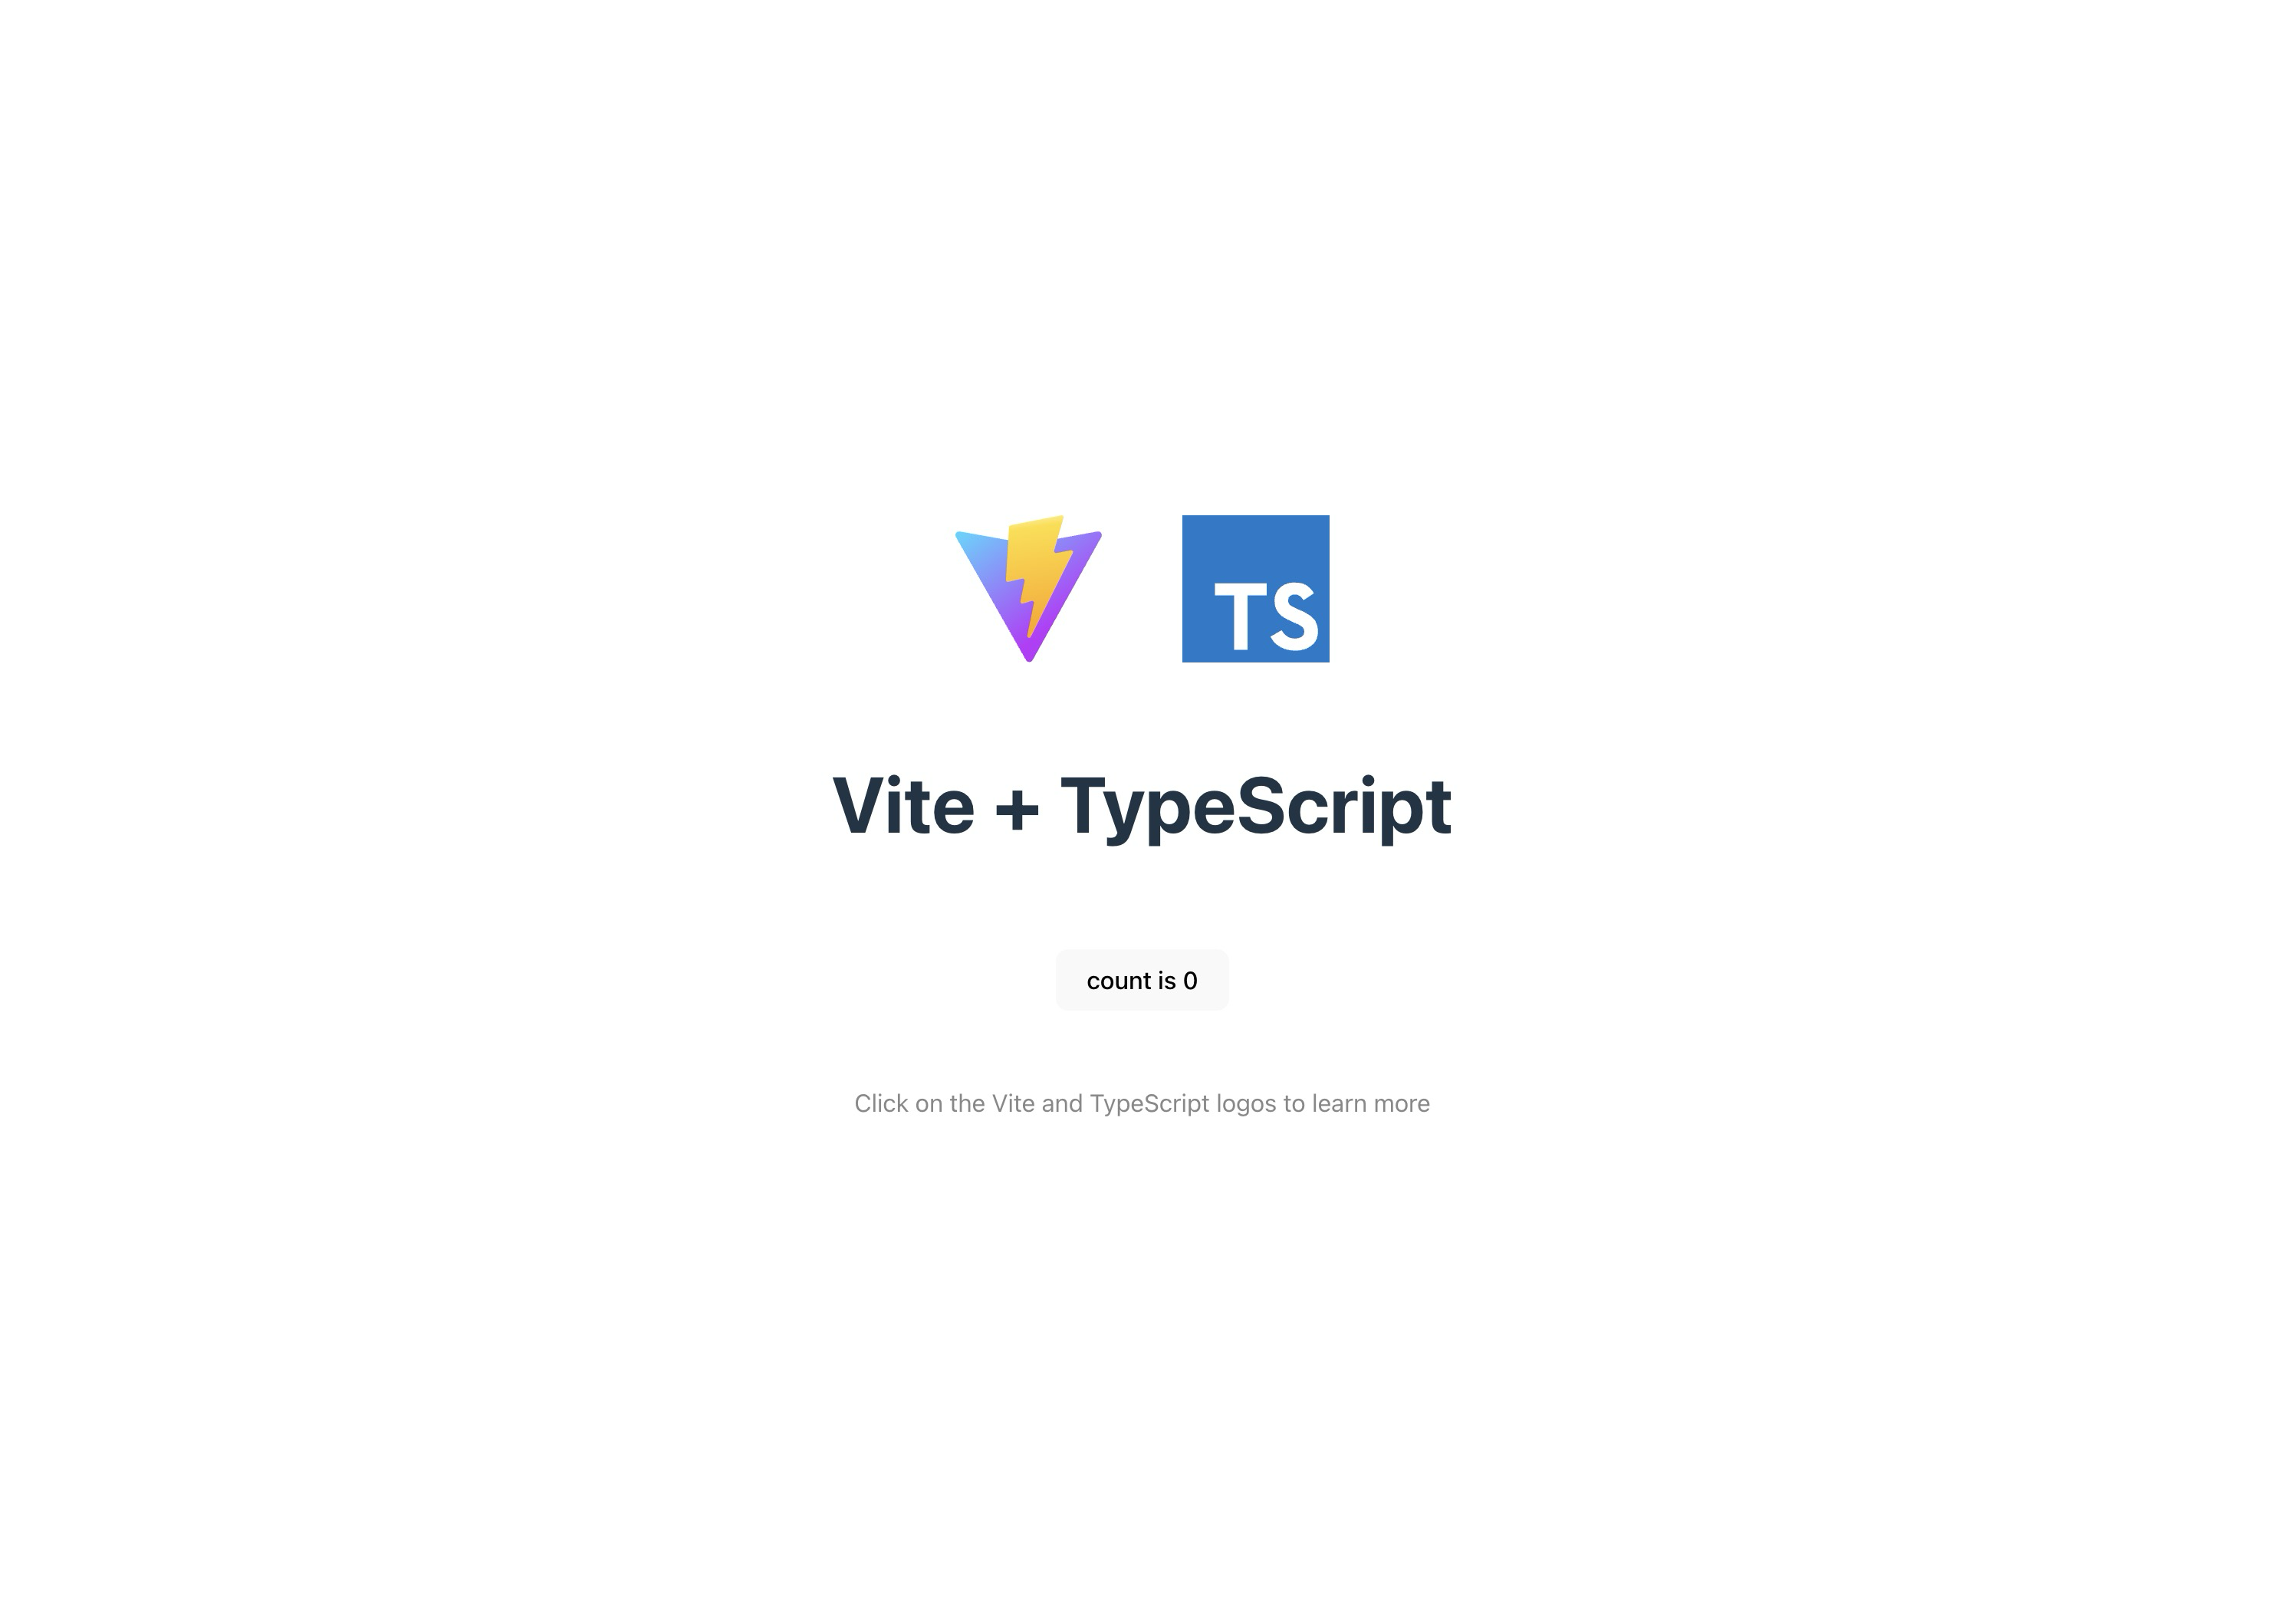
If GitHub Actions is running properly, we can see the deploy job which is functioned to deploy the build results to GitHub Pages will appear as shown below.
Conclusion
Congratulations! You have successfully implemented unit testing using Vitest, integrated it with Codecov to track code coverage, and automated this process using GitHub Actions. With this configuration, every time you push to the repository, your code will be automatically tested and the code coverage report will be updated.
This practice is essential in modern application development, helping you detect bugs early and ensuring consistent code quality. Badges in README.md also provide transparency about the status of your project to contributors and users.