Node.js Ultimate Guide for Beginner — Part 1
You may want to read this article in Bahasa Indonesia version: Node.js Ultimate Guide untuk Pemula — Part 1
TL;DR
JavaScript is currently one of the most popular programming languages, especially for building web-based applications. Initially introduced in 1995 by Brendan Eich as a programming language running in Netscape Navigator browser, JavaScript could only operate on the client side (front-end) back then. Server-side or back-end applications were built using different programming languages such as Java, PHP, ASP.NET, and many others, making it impossible to create a full-stack web application using only one language. You would need one language for the server side and JavaScript for the client side.
However, the arrival of Node.js in 2009 changed all of that. With Node.js, a programmer can now use JavaScript for both client and server sides. This simplifies the development process significantly, allowing us to focus solely on JavaScript without needing to learn additional programming languages.
In this article, we will briefly discuss Node.js, starting from what it is, how to install it on your computer, to creating a simple program and deploying it.
What is Node.js?
Node.js is not a programming language but a runtime platform built using Google Chrome’s V8 engine. Initially launched by Ryan Dahl in 2009, Node.js revolutionized programming by allowing developers to build server-side applications using JavaScript, which had previously been confined to the browser. As of this article’s writing, Node.js has reached version 20.17.0 (Long Term Support) and version 22.9.0 with an estimated 6.3 million websites worldwide using Node.js as their technology.
Node.js operates similarly to other runtime platforms like Apache and Nginx. When a client request is sent to the server, Node.js handles the request and sends a response, which can be HTML, JSON, or even a file.
Installing Node.js
There are multiple ways to install Node.js, and one of the official methods is detailed at https://nodejs.org/en/download/package-manager.
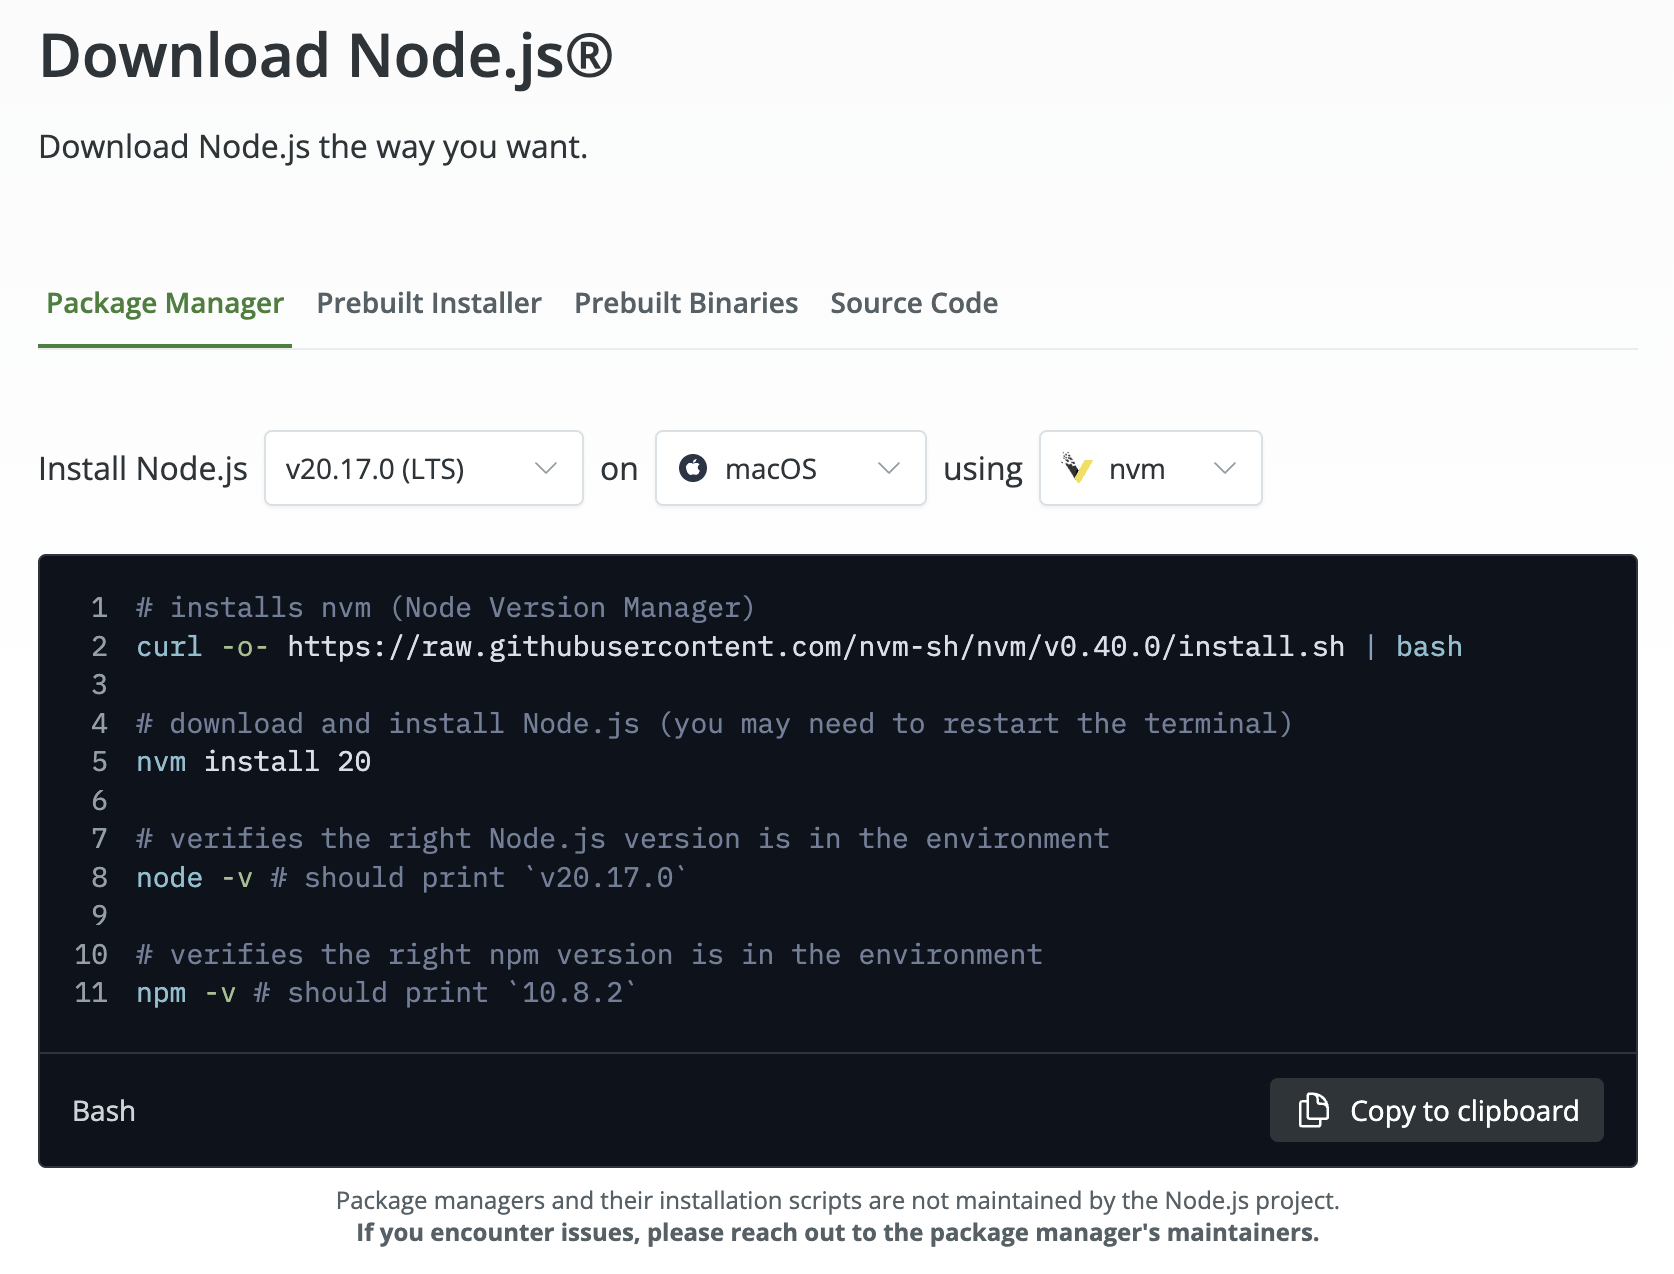
To verify if Node.js is installed, you can check it through the terminal with the following commands:
# verifies the right Node.js version is in the environment
node -v # should print `v20.17.0`

# verifies the right npm version is in the environment
npm -v # should print `10.8.2`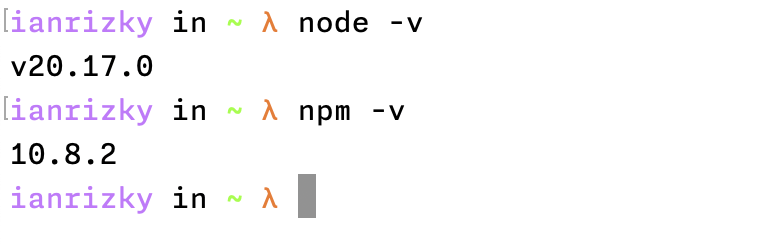
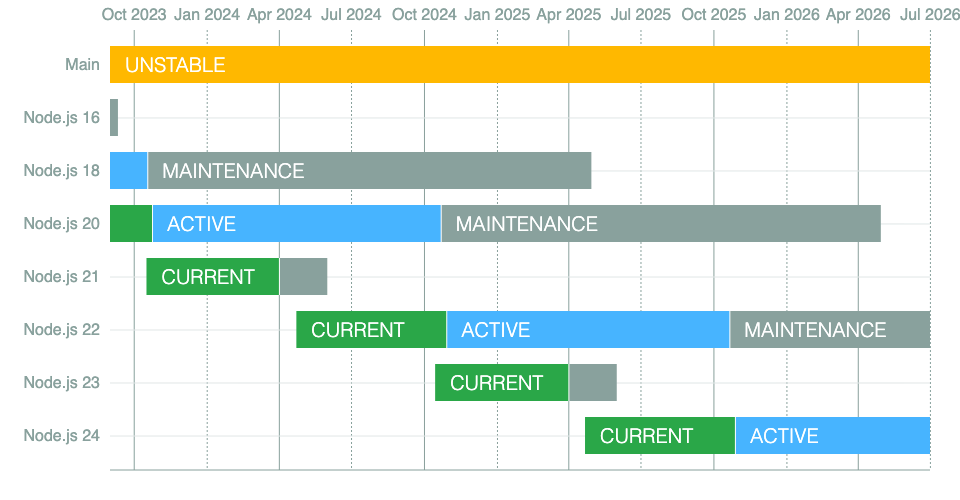
One thing to note is that Node.js has many versions, unlike other programming languages that are relatively stable with longer release cycles. Since its release in 2009, Node.js now has 22 major versions, with a new version being released every six months.
| Node.js Version | Codename | Release Date |
|---|---|---|
| v22.9.0 | - | 2024-09-17 |
| v21.7.3 | - | 2024-04-10 |
| v20.17.0 | Iron | 2024-08-21 |
| v19.9.0 | - | 2023-04-10 |
| v18.20.4 | Hydrogen | 2024-07-08 |
Comparatively, PHP only releases a new version every 1-2 years.
| PHP Version | Release Date |
|---|---|
| 8.1 | 25 Nov 2021 |
| 8.2 | 8 Dec 2022 |
| 8.3 | 23 Nov 2023 |
Because of Node.js rapid version releases, using a version manager becomes essential. It helps ensure that you don’t mix up different Node.js versions across multiple projects. Version managers also ensure your application runs on the same Node.js version, whether on your local machine, another developer’s machine, or the deployment server.
Several Node.js version managers are recommended, with Node Version Manager being one of the most popular. However, I recommend Volta for its simplicity and features. For a detailed explanation, check out this article:
Volta: A Better Node.js Version Manager Than NVM
Hello World in Node.js
REPL (Read Evaluate Print Loop)
REPL is a programming environment in which you can input single JavaScript expressions and immediately see the output. It is especially useful for quickly testing small snippets of JavaScript code without needing to create files.
To create a Hello World program in Node.js REPL, open your terminal and type:
nodeThen enter the following console.log command:
console.log('Hello world');
To exit REPL, press Ctrl+C.
index.js file
Alternatively, you can create a new file named index.js and execute it in Node.js. Create the following index.js file:
console.log('Hello world');Then, run the following command in the terminal:
node index.jsYou’ll see the following output in your terminal:

Since the file is named
index.js, you can replace the commandnode index.jswith justnode .as Node.js will automatically prioritize files namedindexas the folder’s index file.
Simple REST API
The simplest way to create a REST API in Node.js is by using the HTTP API. Here’s an example:
const http = require('http');
const server = http.createServer((req, res) => {
res.statusCode = 200;
res.setHeader('Content-Type', 'text/plain');
res.end('Hello, World!\n');
});
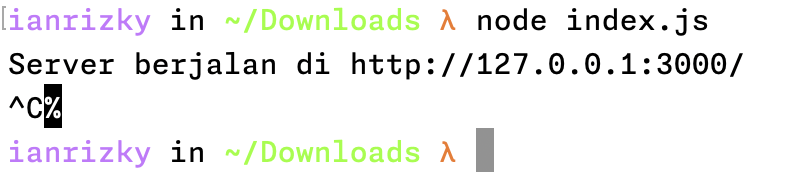
server.listen(3000, '127.0.0.1', () => {
console.log('Server berjalan di http://127.0.0.1:3000/');
});Run this in the terminal with the following command:
node index.jsYou’ll see the following output in your terminal:
You can now check this API endpoint in your browser or with API tools like Postman or Insomnia.
Since most Node.js APIs are non-blocking, the command node index.js will keep running until you stop it. To terminate it, press Ctrl+C.
Node.js Runtime
As a runtime, Node.js allows JavaScript code to run on servers, meaning that all the global functions you’re familiar with from the browser, like console or global, are available. Node.js also introduces several global functions that are not found in the browser, such as:
process
Process API provides functions to get data about the running Node.js process. For example, process.platform can retrieve the operating system (Linux, Windows, macOS, etc.), and process.env is used to access environment variables.
crypto
The Crypto API provides functions for performing various cryptographic operations such as hash, cipher, decipher, sign, and verify using OpenSSL.
const { createHmac } = require('node:crypto');

const secret = 'abcdefg';
const hash = createHmac('sha256', secret)
               .update('I love cupcakes')
               .digest('hex');
console.log(hash);
// Prints:
//   c0fa1bc00531bd78ef38c628449c5102aeabd49b5dc3a2a516ea6ea959d6658e
Text Editor
After trying to create hello world, the next step is to ensure that the text editor you are using for developing applications with Node.js is properly configured. This includes what extensions are needed to support the development process and the settings that need to be set up.
Why Use VSCode?
As a code editor, VSCode has become one of the most popular choices and is compatible across all operating systems. Some of the main features of VSCode include:
- Lightweight and fast: Doesn’t burden the system but remains powerful.
- Extensive ecosystem: Supports many extensions for almost all programming languages.
- Great built-in features: Integrated terminal, Git support, IntelliSense, and debugging.
- Free and open-source: No cost and backed by an active community continuously improving its functionality.
- Cross-platform: Can be used on Windows, macOS, and Linux.
Extensions I Use in VSCode
Here are some extensions I use in VSCode to support the Node.js development process:
VSCode Configuration
To ensure that your VSCode configuration can be accessed consistently across different environments, I recommend storing all configurations in the .vscode folder within the project. For example, I will create a new folder and open it in VSCode.
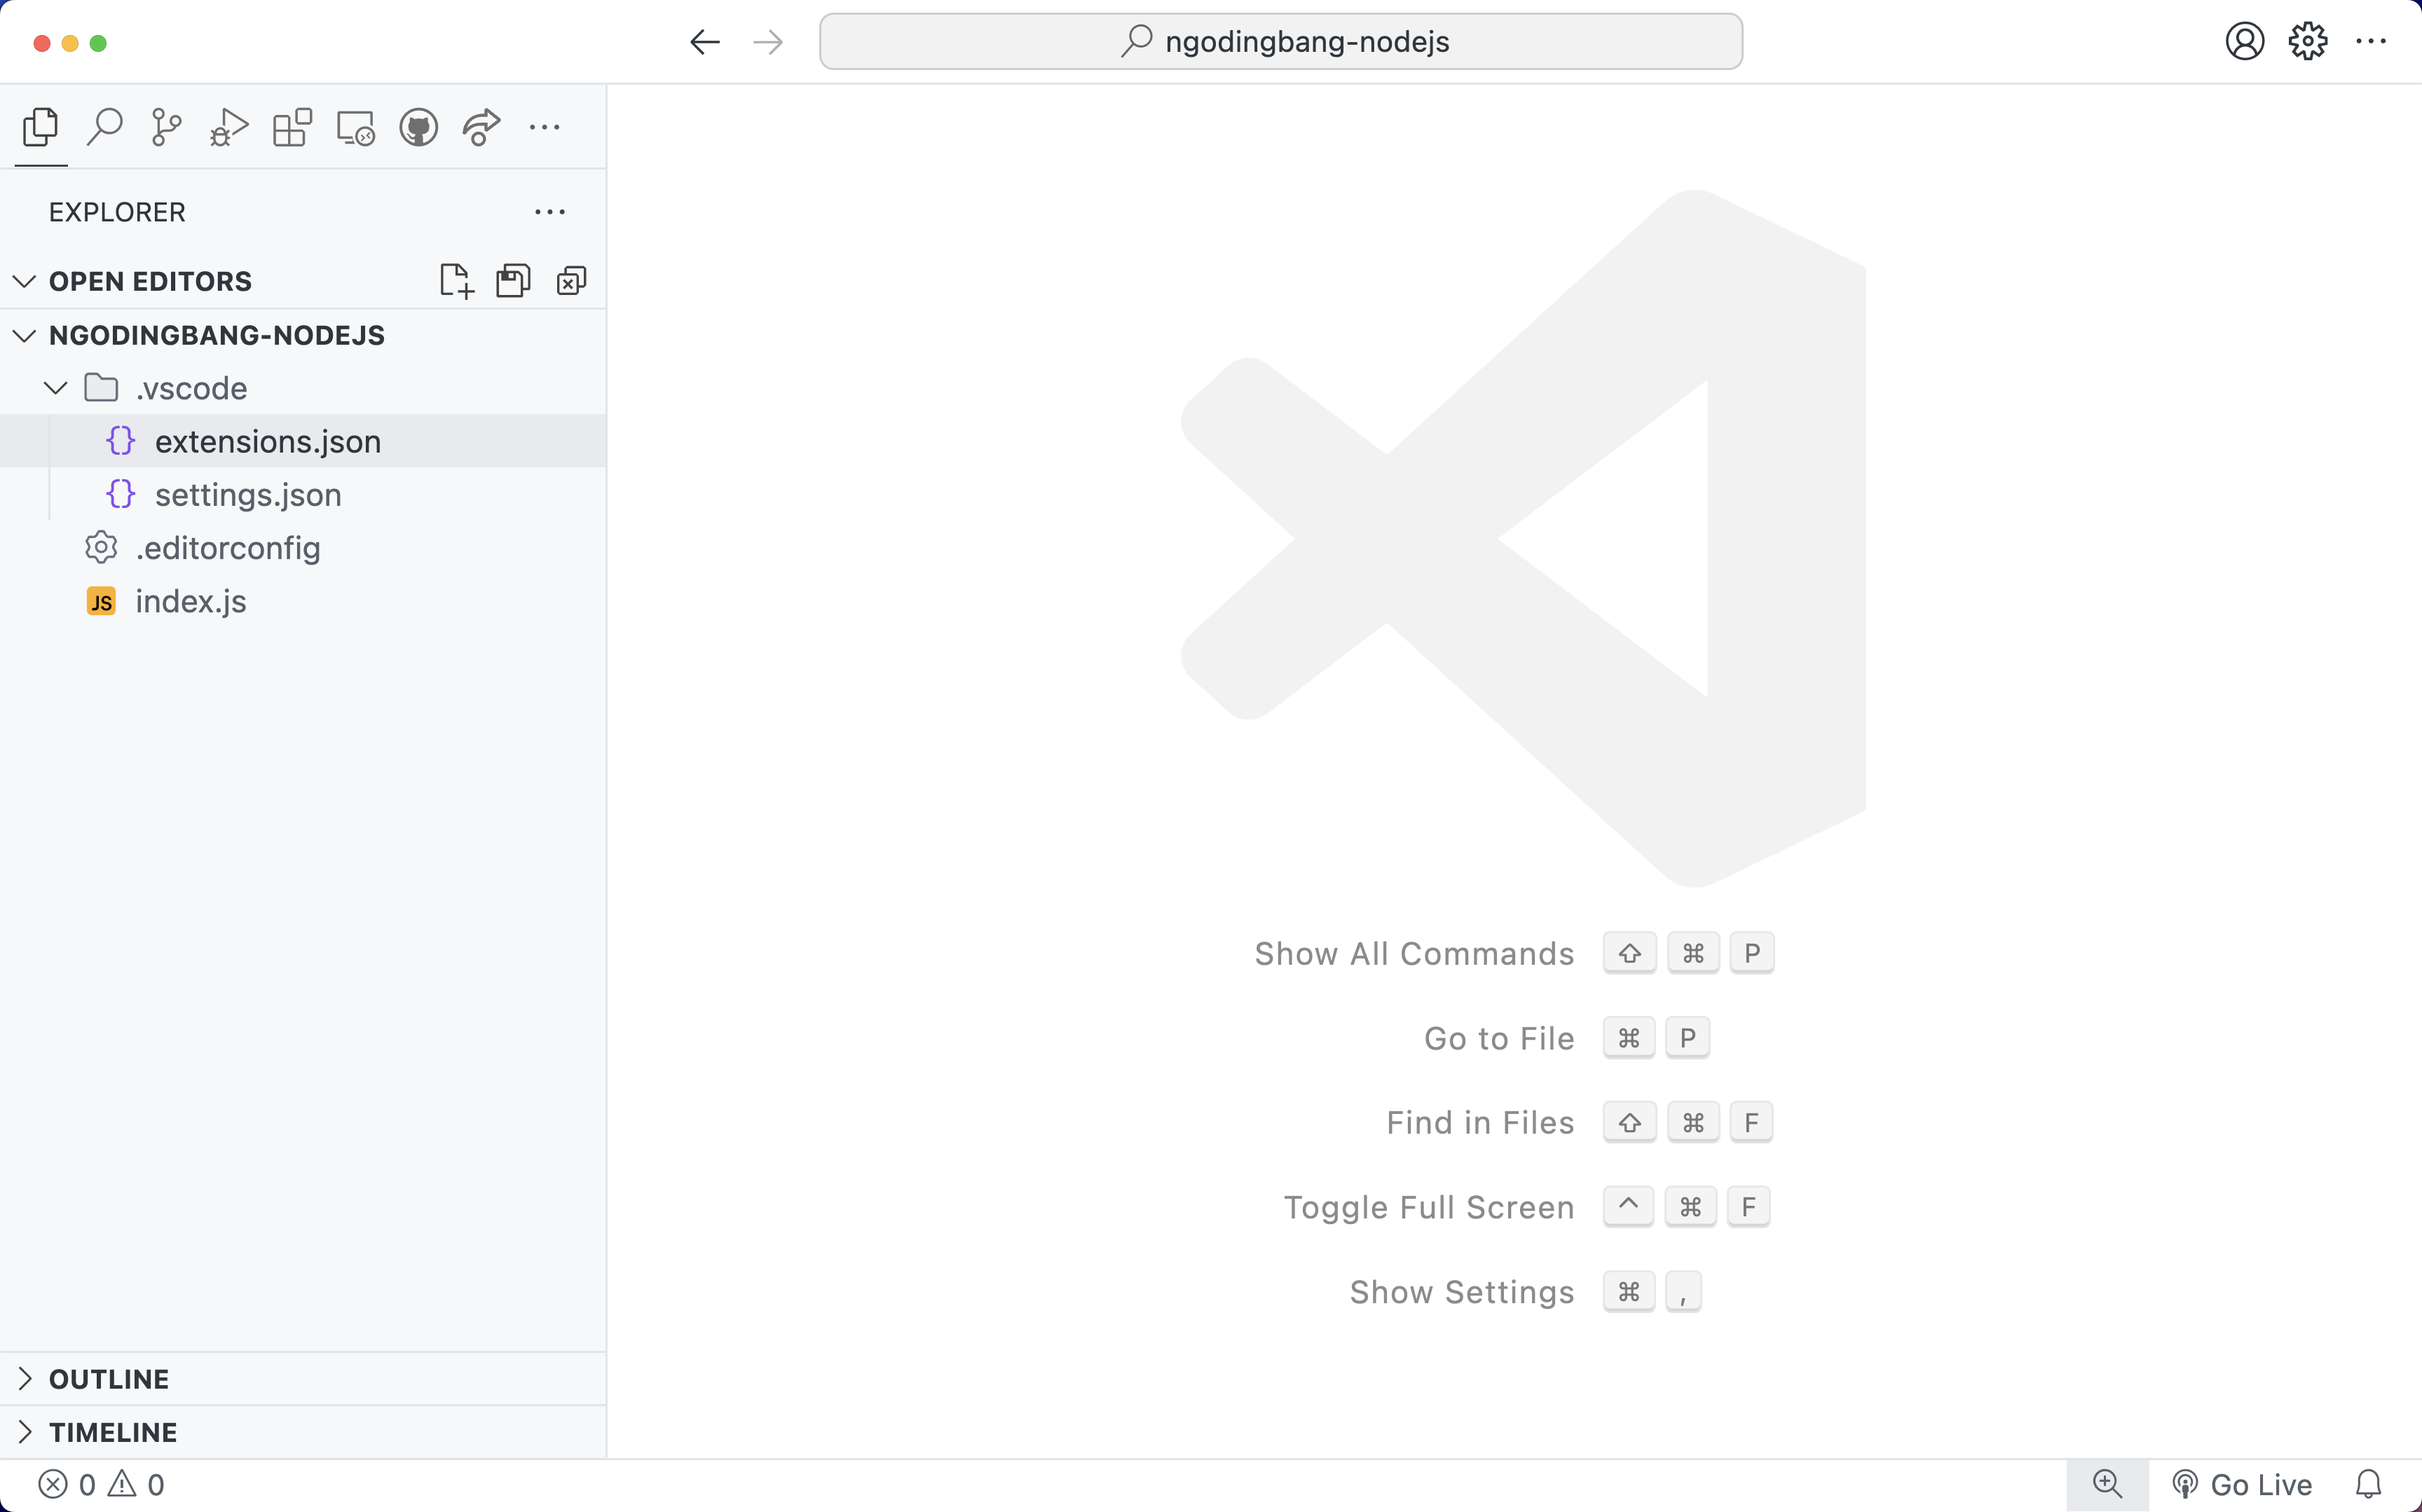
In this folder, there are two important files, extensions.json and settings.json, which play a crucial role in storing all your VSCode configurations, specifically for the project, and committing them to version control, such as Git or similar systems.
Configuring Extensions in VSCode
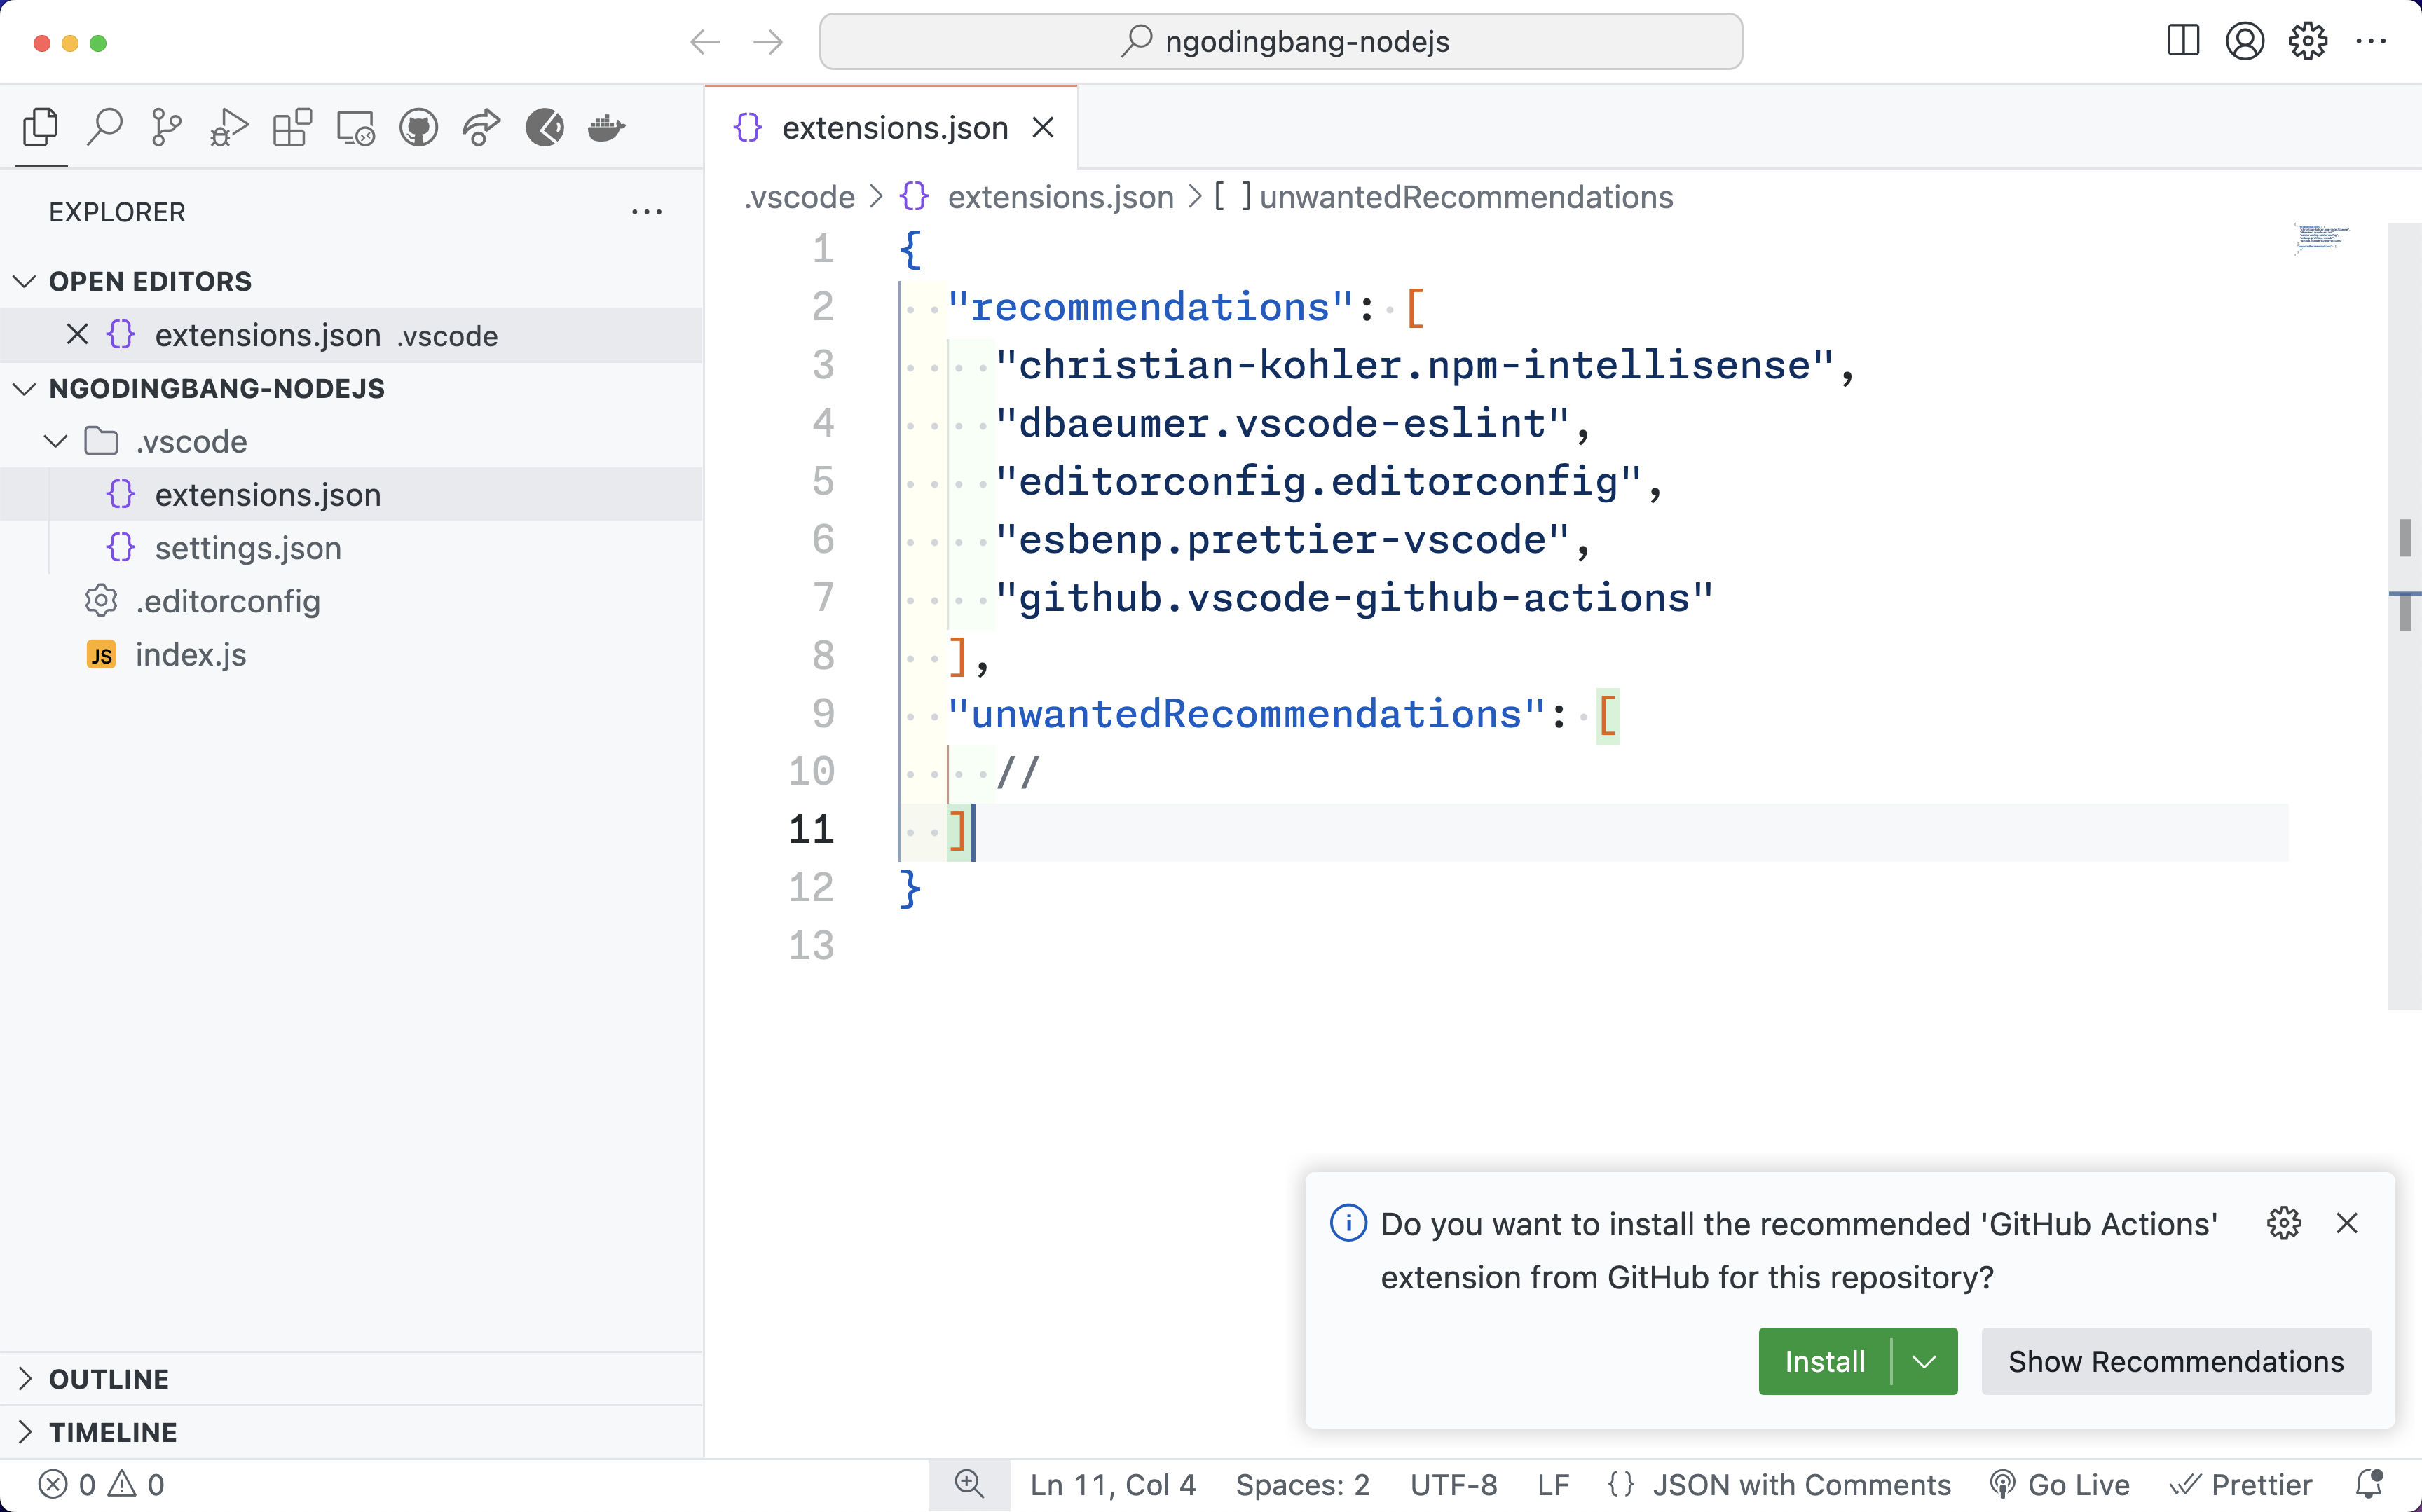
To ensure every developer working on your project has the same extensions, you can add them in extensions.json as shown below.

Here, two properties can be used: recommendations and unwantedRecommendations. As the names suggest, recommendations contains the list of extensions you recommend to other developers working on the project, while unwantedRecommendations lists the extensions that are not recommended. When another developer opens the project and doesn’t have an extension from the recommendations list installed, VSCode will issue a warning like this:
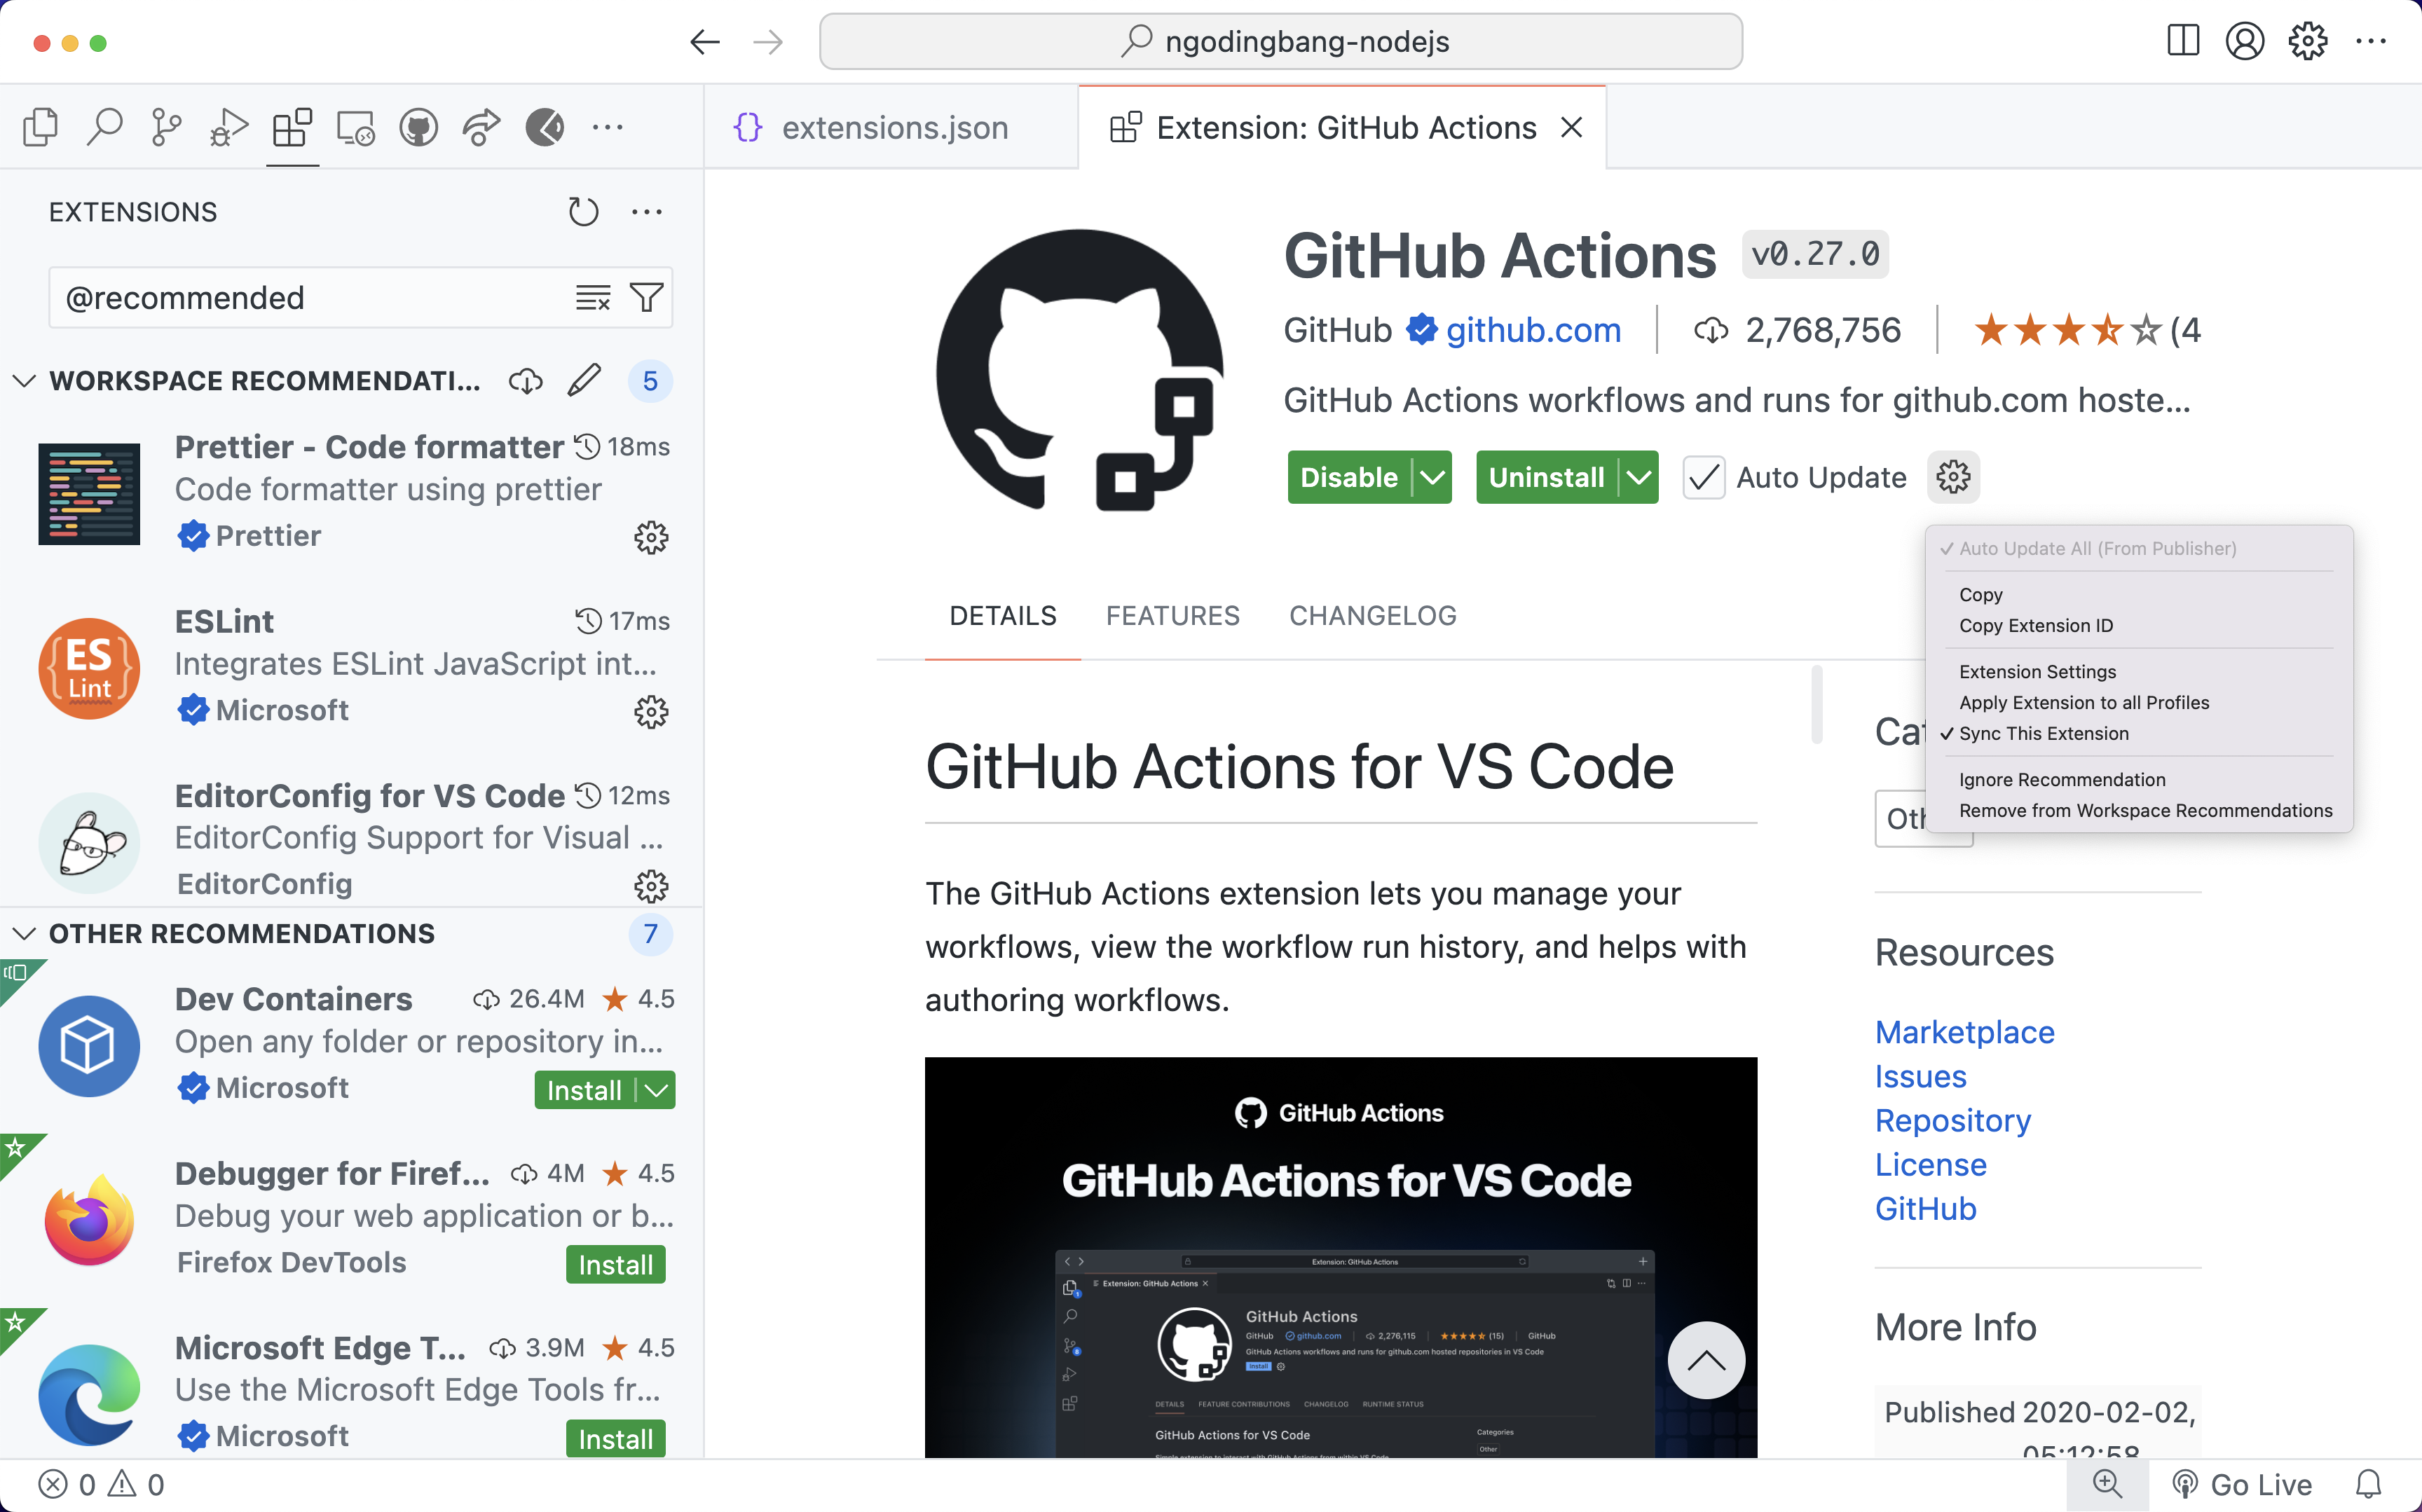
Developers can then follow the suggestions from VSCode by clicking “Install”, and VSCode will automatically install the extension.
To add extensions to extensions.json, simply go to the Extensions panel in VSCode, find the desired extension, and copy its Extension ID into the recommendations list in extensions.json.
Configuring Formatter in VSCode
Besides adding extensions in extensions.json, we also need to store other configurations in the settings.json file within the .vscode folder, as shown below.
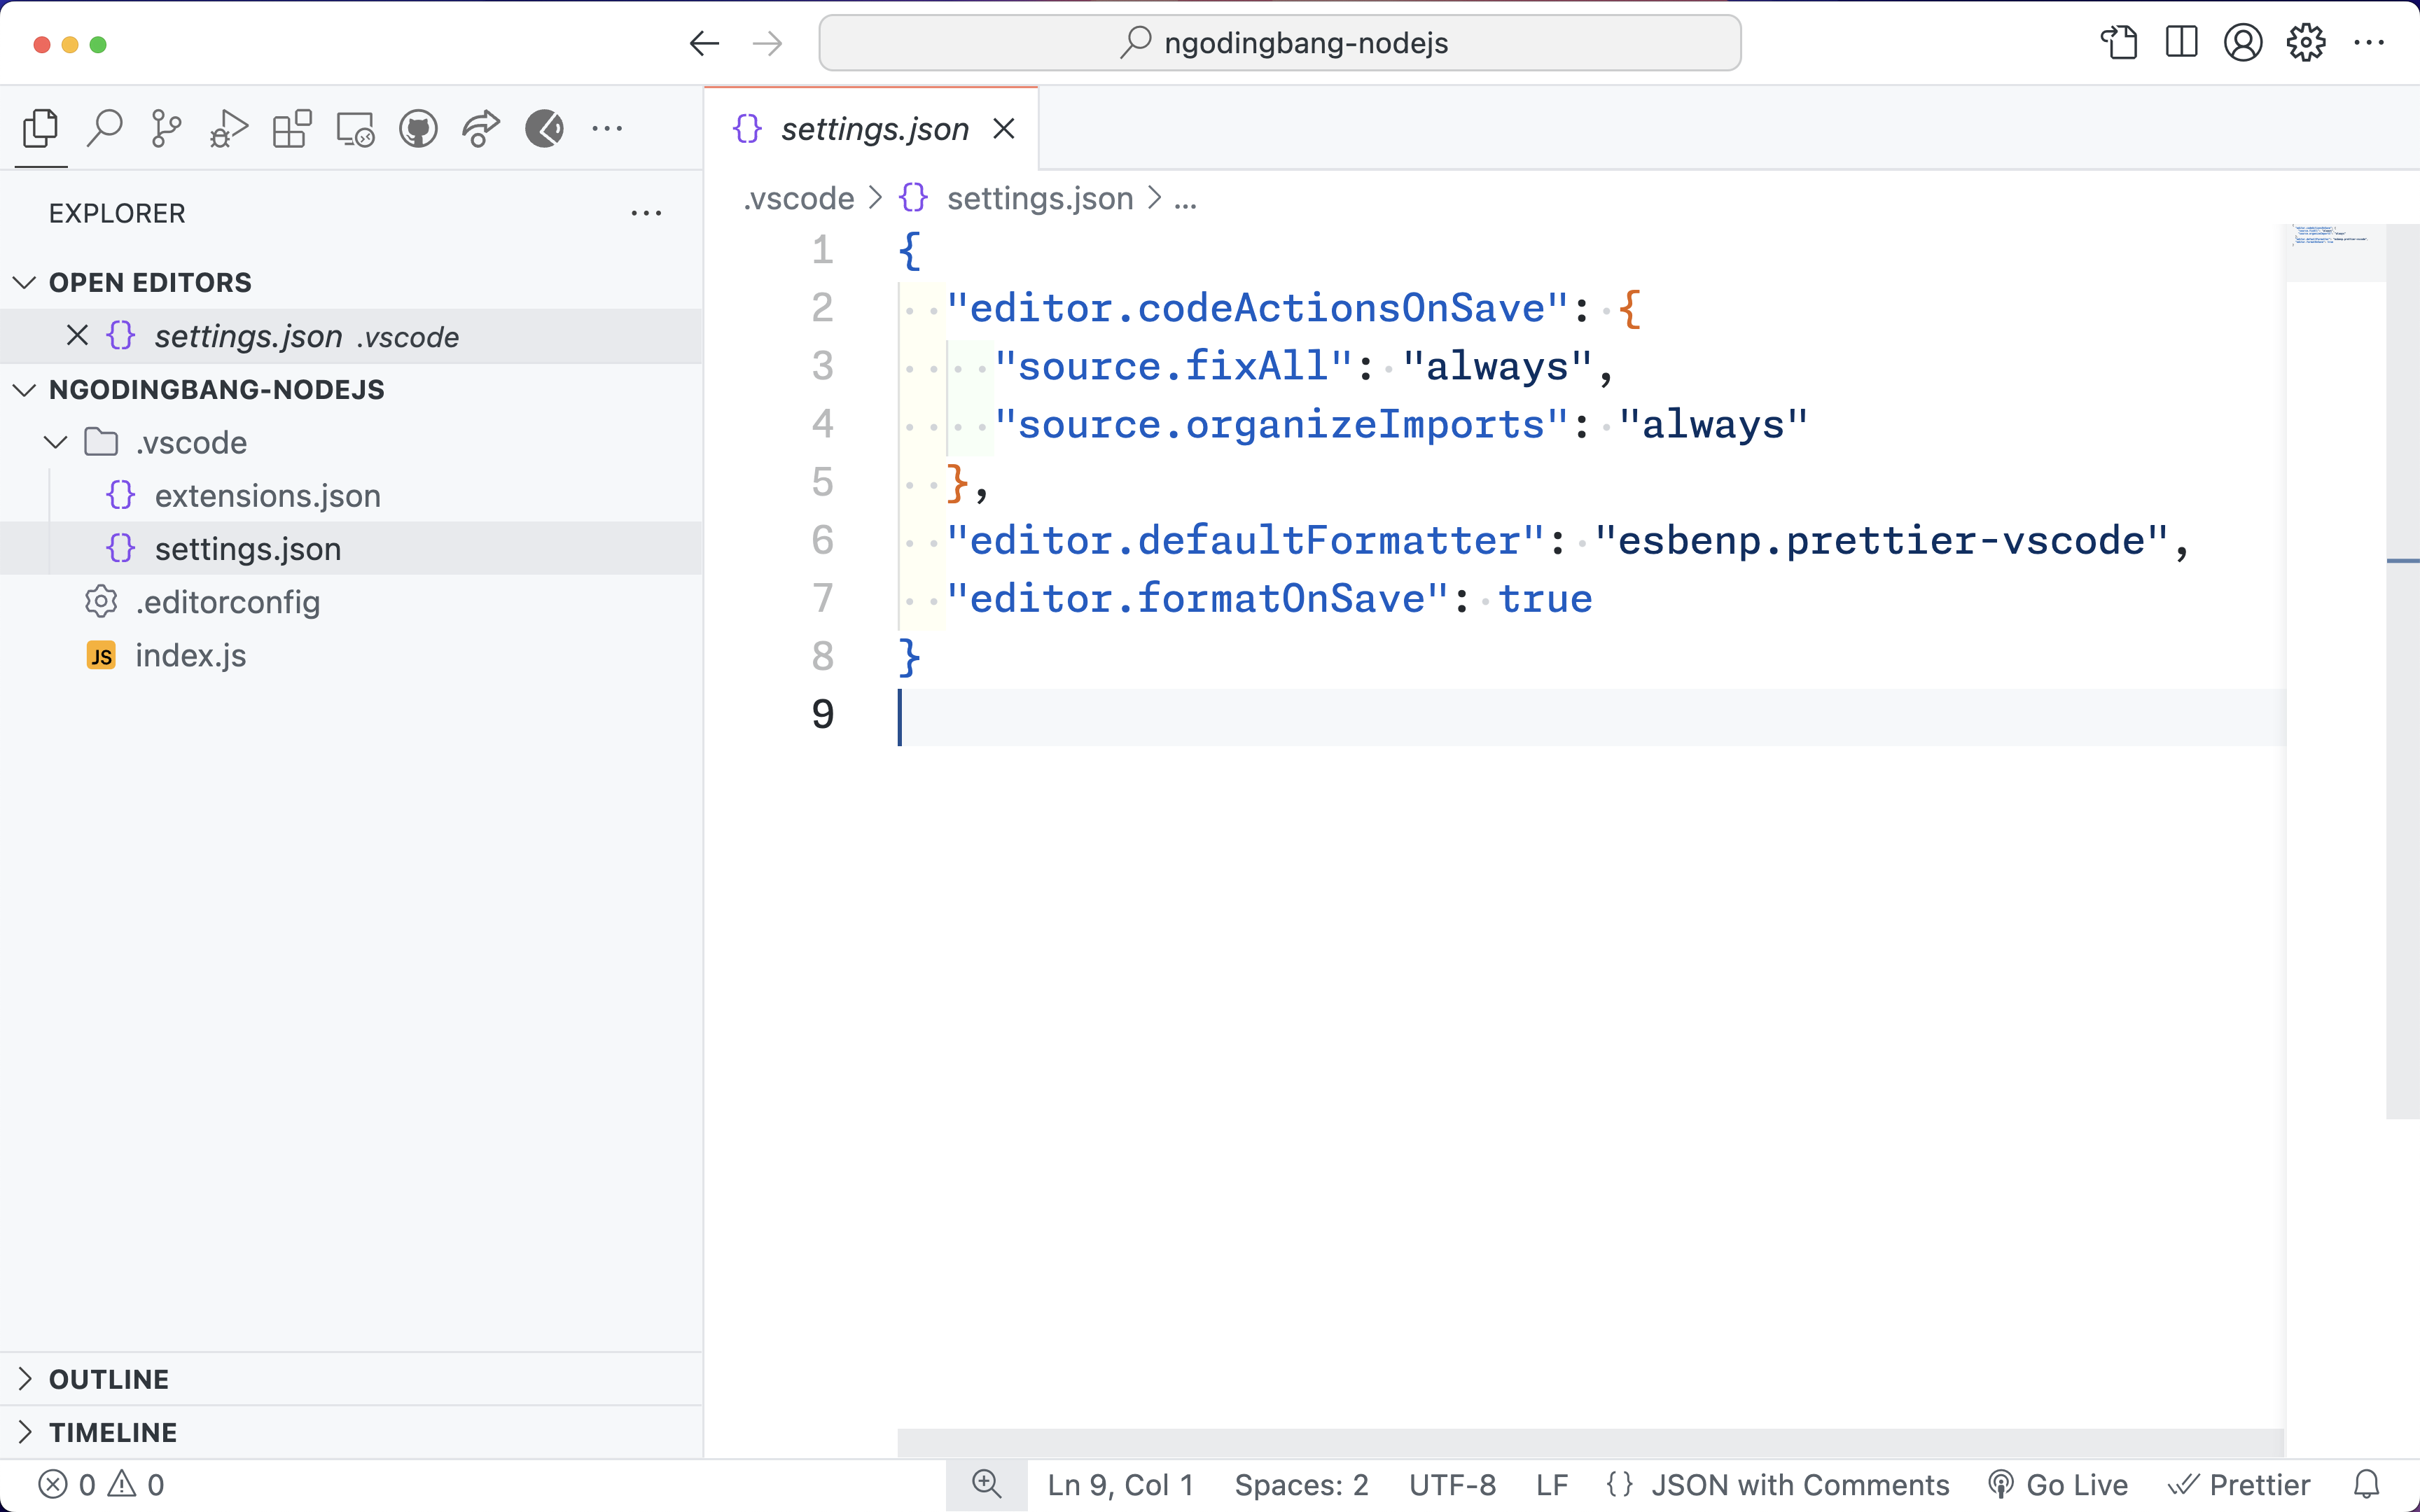
Some important configurations to consider include editor.formatOnSave, which automatically runs the formatter when the file is saved. This configuration only works if you’ve set the default formatter using editor.defaultFormatter. There are many formatters available in VSCode, but I recommend using Prettier - Code formatter as the default formatter in VSCode.
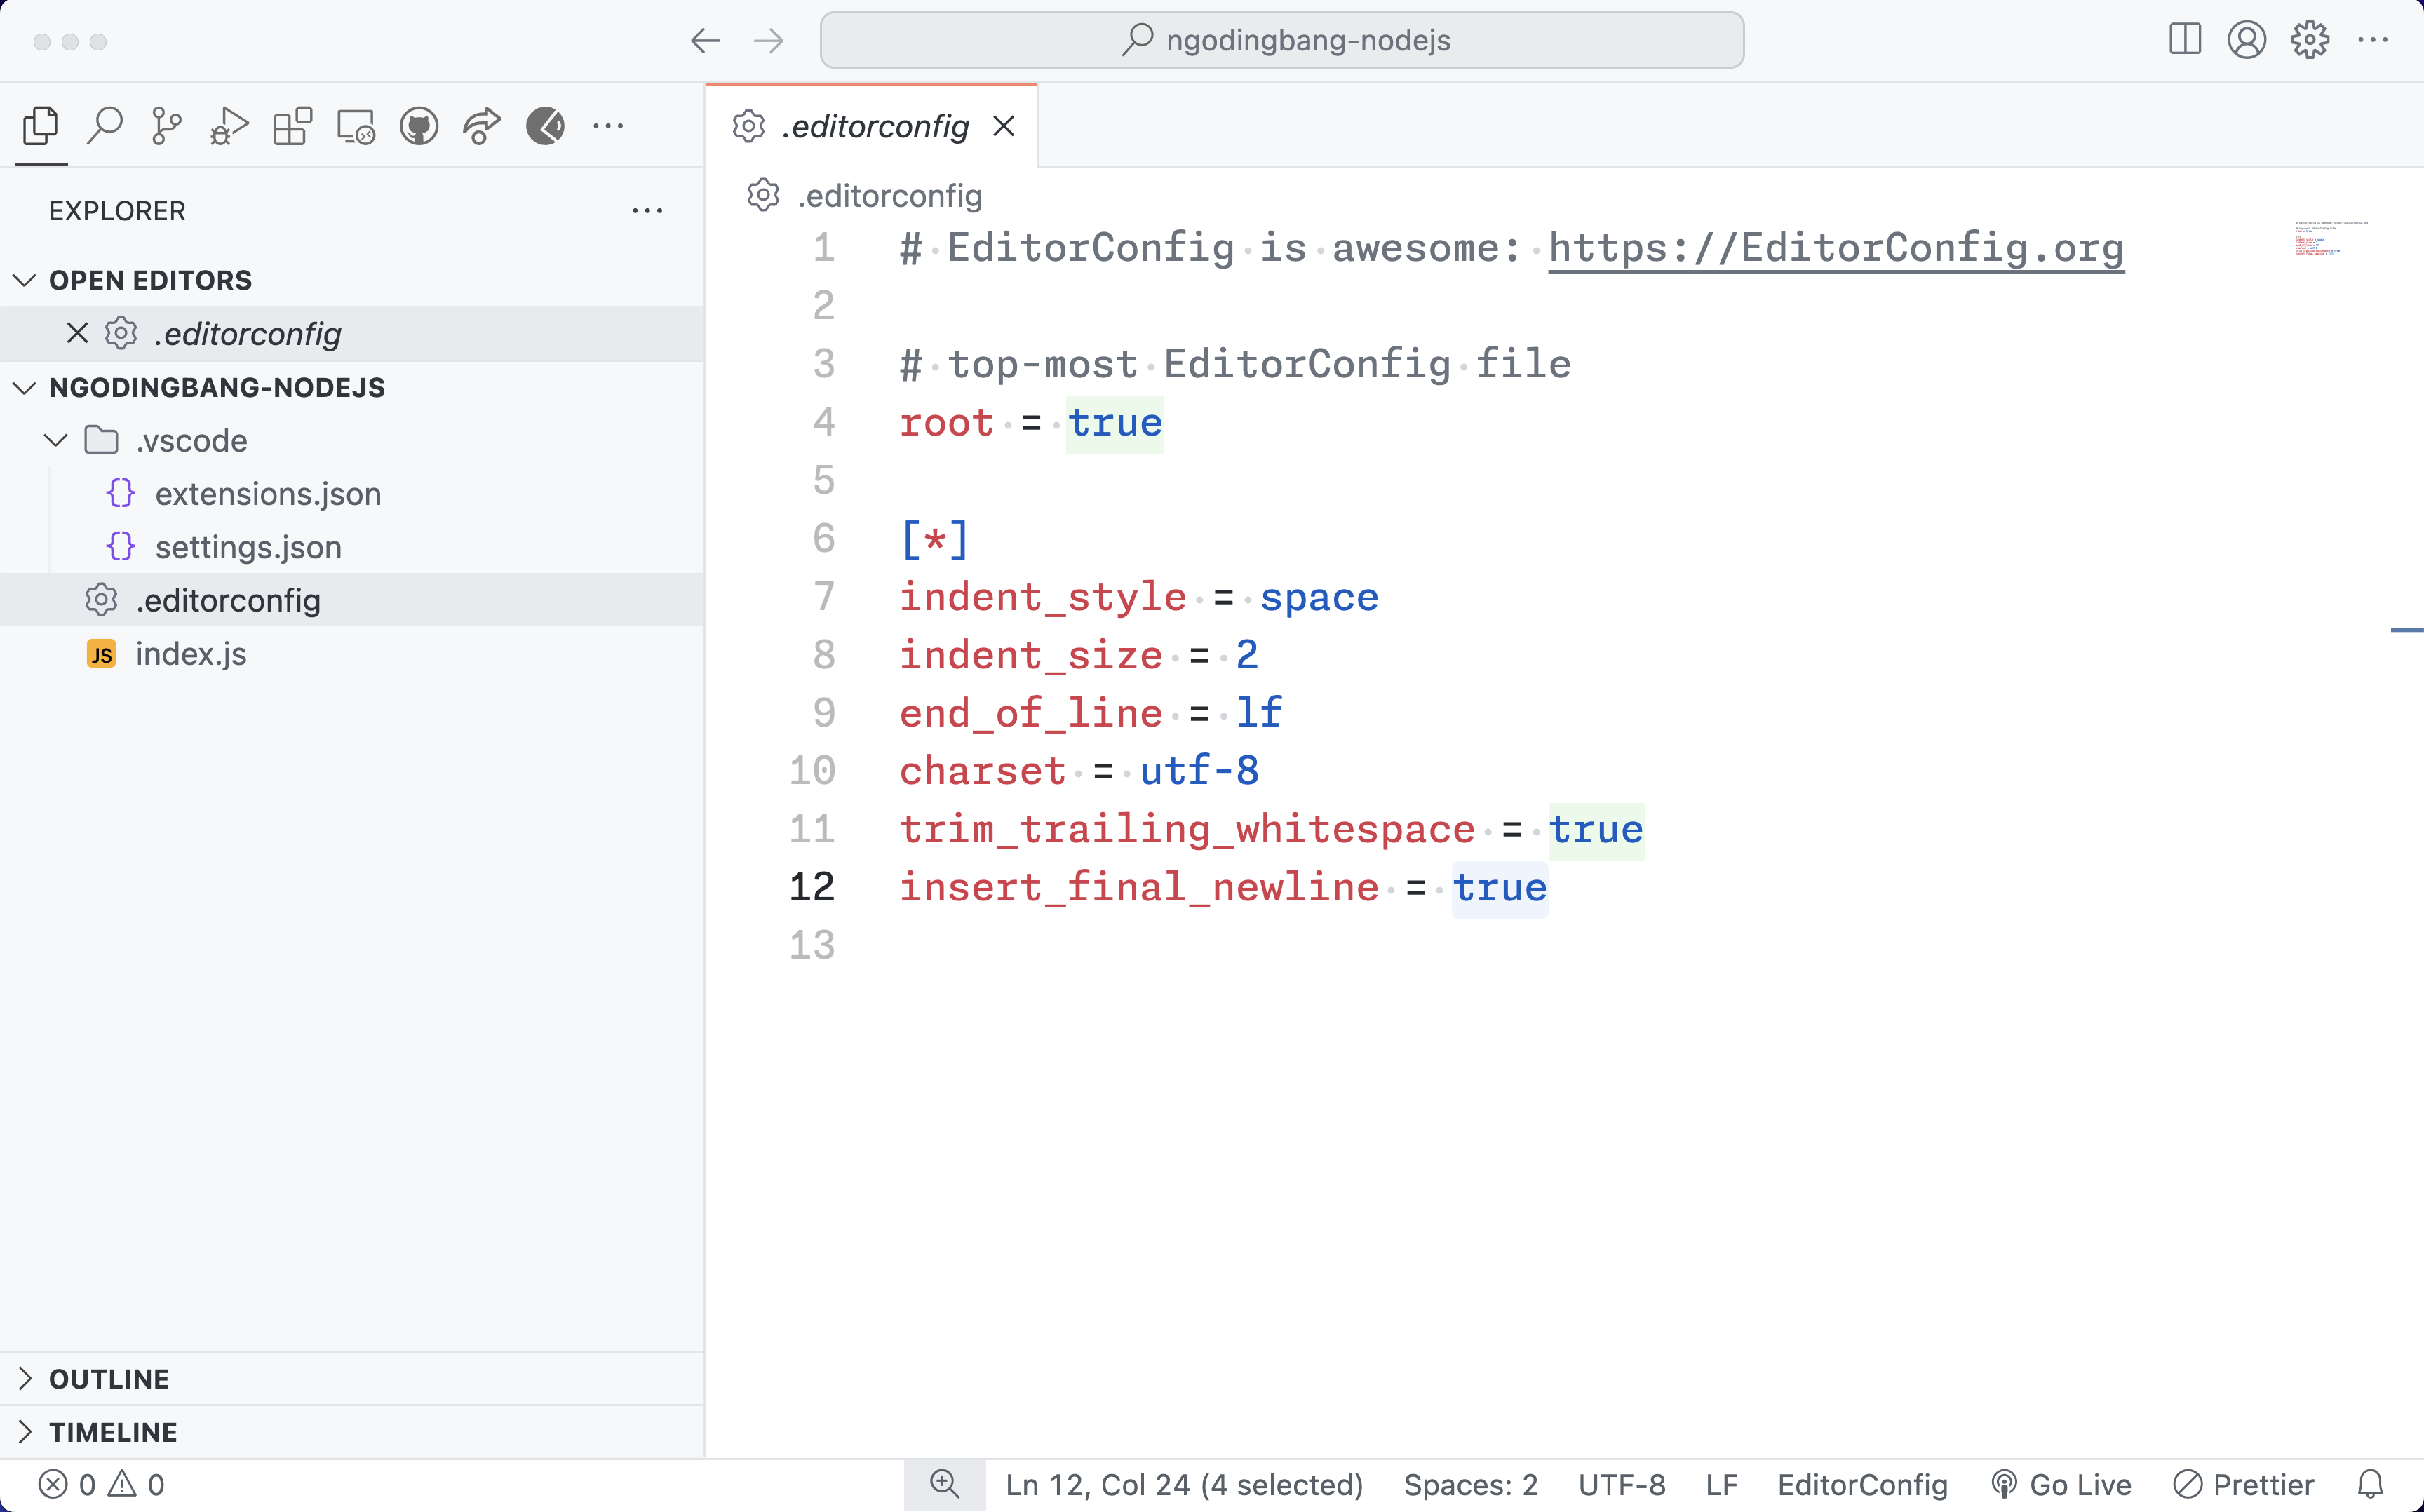
In addition to using Prettier, you can add further configuration using editorconfig. Some specific configurations handled by editorconfig include:
indent_style(using space or tab).trim_trailing_whitespaceto remove unnecessary whitespace characters.insert_final_newlineto ensure every file ends with a single newline character.- and many more.
Conclusion
In the next part, we’ll explore how Node.js works, especially about the concept of callback, Promise, and also async and await in JavaScript and how to implement that in Node.js. If there are other topics you’d like to discuss, please share your thoughts in the comments section. Thank you!